What’s this about?
This is an official rules reference for Dice Throne.
It’s great for finding a specific rule quickly. It’s also an excellent supplement to the rulebook included in the box, when watching a how-to-play video, or while teaching the game.
Usage Tips
Back & Forward Nav: Think of each rule entry as a separate webpage. If you want to jump back, hit your Back button.
Check the Index : Don’t see what you’re looking for? The Index has every term in the game.
Install it: This site is a (Progressive Web App). You can install it as a standalone app that is lightning fast, and works even when you’re offline.
Link to a rule: Want to share a link to a particular rule? Just click its title!
Credits
Game design: Nate Chatellier, Manny Trembley
Game development: John Heidrich, Gavan Brown
Product & graphic design: Gavan Brown, Gui Landgraf, Gabriel Martin, Noah Adelman
Illustration: Manny Trembley, Nick Malara, Damien Mammoliti
Main rulebook editors: Simon Rourke, Aaron Hein, John Heidrich (and many others who helped)
Current Playtesters: Aaron Hein, Adam Thies, Aaron Waltmann, Jonathan Herrera-Thomas, Kevin Heidrich, Jacob Thies, Rick May, Joel Smart, Darnell Malone, Nick Lem, Blake Royall, Drake Finney, and the whole Beta Team.
Special thanks: Aaron Waltmann, Kira Anne Peavley, Aaron Hein, Adam Wyse, Paul Saxberg, Mr. Cuddington, Dan Tolczyk, Jonathan Herrera-Thomas, George Georgeadis, Brenda & Paraic Mulgrew (Knight Watch Games), Love Thy Nerd, Brett MacDonald, and to anyone we missed who has helped us make Dice Throne a success.
For hero specific credits, see hero leaflets.
And the BIGGEST thanks goes to you for purchasing this game and helping us to pursue our dream of creating Dice Throne.
Turn Phases
Upkeep Phase: Resolve any Upkeep Phase maintenance (generally specified by Status Effects or Passive Abilities).
Income Phase: Gain & draw card from your deck. Start Player skips their first Income Phase.
Main Phase (1): Spend to play Hero Upgrade cards or Main Phase Action cards. Sell (discard) unwanted cards for each.
Offensive Roll Phase: Roll any number of your dice in up to 3 Roll Attempts and activate a single Offensive Ability that your Final Dice Result meets the Activation Requirement for. Any player may play Roll Phase Action Cards.
-
Targeting Roll Phase: Skip this phase. Roll 1 die… Target any player. However, you receive a bonus card if you Attack the Leader.
- 1–2
- Target the opponent on your left.
- 3–4
- Target the opponent on your right.
- 5
- Your opponents choose which of them you target.
- 6
- Choose either opponent as your target.
- 1–2
- Target the opponent on the left.
- 3–4
- Target the opponent in the middle.
- 5–6
- Target the opponent on the right.
- 1–4
- Count around the table moving clockwise starting with the closest opponent on your left.
- 5–6
- Choose an opponent as the target.
Any player may play Roll Phase Action Cards.
Defensive Roll Phase: If you activated an Attack during your Offensive Roll Phase, your opponent activates their Defensive Ability with a single Roll Attempt. Any player may play Roll Phase Action Cards.
Main Phase (2): Identical to Main Phase (1).
Discard Phase: Sell (discard) cards for each until you have or fewer cards in your hand.
Heroes
 Artificer
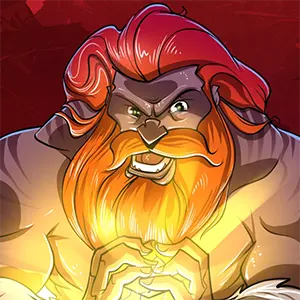 Barbarian
 Cursed Pirate
 Gunslinger
 Huntress
 Krampus
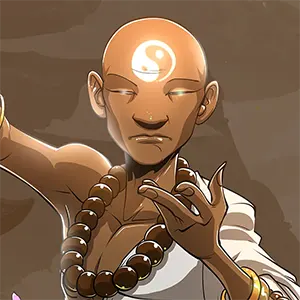 Monk
Monk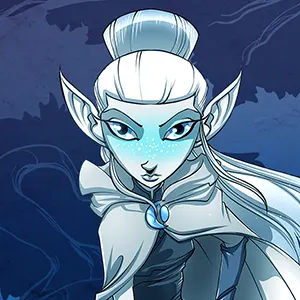 Moon Elf
 Ninja
Ninja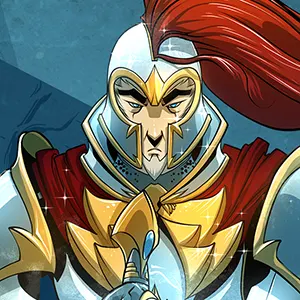 Paladin
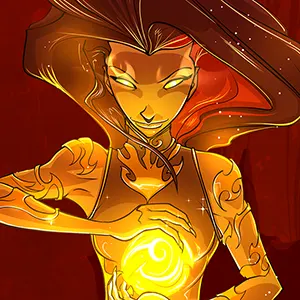 Pyromancer
 Samurai
 Santa
Santa Seraph
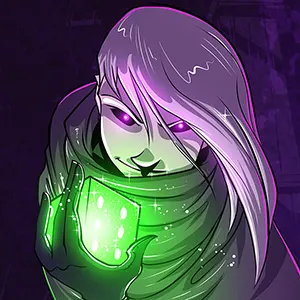 Shadow Thief
 Tactician
 Treant
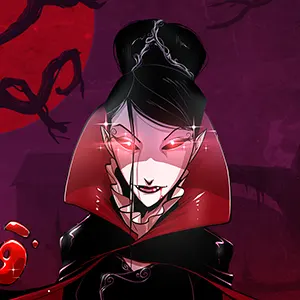 Vampire Lord
Learn more about the heroes at dicethrone.com
Tokens
- Accuracy
- Back Strike
- Barbed Vine
- Bleed
- Blessing of Divinity
- Blind
- Blinding Light
- Blood Power
 Bonus Damage
- Bounty
- Burn
 Chaos
Chaos Cheer
Cheer- Chi
- Cleanse
- Coal
- Concussion
- Constrict
- Crit
 Cursed Doubloon
- Delayed Poison
- Dominance
 Dryad Spirit
 Egg Nog
- Entangle
- Evasive
- Fire Mastery
- First Strike
- Flight
 Gift
Gift Heal Bot
- Hex
- Holy Presence
- Honor
 King’s Hand
- Knockdown
- Life Siphon
- Loot Chests
- Mesmerize
 Nanite
 Nanobot
- Ninjutsu
 Nyra
Nyra- Nyra’s Bond
- Parasite
- Parlay
- Poison
 Portal Shards
- Powder Keg
- Protect
 Rejects
- Reload
- Retribution
 Salve
Salve Sapling Spirit
 Seedling Spirit
- Shadows
- Shame
 Shock Bot
- Silence
- Smoke Bomb
- Sneak Attack
- Stun
- Synth
- Tactical Advantage
- Targeted
- Wellspring
- Wither
Damage Table
Defendable |
Avoidable |
Enhanceable |
Special Targeting |
|
|---|---|---|---|---|
| Normal Damage | Yes | Yes | Yes | No |
| Undefendable Damage | No | Yes | Yes | No |
| Pure Damage | No | Yes | No | No |
| Collateral Damage | No | Yes | No | Yes |
| Ultimate Damage | No | No | Yes | No |
Note: Damage that occurs outside of an attack (via Status Effect or Defensive Ability) does not have a damage type. That damage can be avoided, but you can’t use an Attack Modifier to enhance it or use a Defensive Ability against it.
Game Setup
Each player should place all of their chosen hero’s components in front of them:
Tokens: Stack your Status Effect and Companion tokens on your leaflet in their associated places.
Health Dial: Set your starting Health to 50 (for a 1v1 game).
Combat Points Dial: Set your starting CP to .
Deck: Shuffle your cards to create a deck. Draw the top cards from your deck. This is your starting hand.
Dice: Roll 1 . The player who rolls the highest number is considered the Start Player and gets to go first.
Additional Setup: Some heroes require unique setup steps. If applicable, these steps will be located on the back of your Hero Leaflet.
Frequently Asked Questions
Note: Each Hero has more rules clarifications.
What is the “Complexity Rating” on each Hero?
The “Complexity Rating” is a number indicating how difficult a Hero is to master. The lower the rating, the more straightforward and easy to use a Hero is. This is not indicative of a Hero’s power or strength, simply their ease of use. Higher complexity Heroes require more intimate knowledge of rules and game mechanics to play well.
What does “Chosen Player” mean?
It means you pick the person and that includes yourself, a teammate, or an opponent.
What does “Chosen Opponent” mean?
It means any player that is not you or on your team.
Can I interrupt a Main Phase card or Roll Phase card by spending a status effect token or playing an Instant Action card?
Yes. Status effects are considered Instant Actions.
Can I interrupt an Instant Action card or spendable status effect by spending a status effect token or playing an Instant Action card?
No. If a status effect is spent its effects cannot be interrupted.
If an ability has variable effects/damage that are determined by one or more dice, can I use Roll Phase Cards to influence or change those dice?
Yes.
Is there a max to ?
Yes, 15.
Can I Heal above my starting Health?
Yes, up to 10 above starting Health.
Does every upgrade card have a level 3?
No.
Can I upgrade an ability directly to level 3 from level 1?
Yes. If you do so, you pay the full cost of the Level 3 upgrade. If you upgrade a Level 2 to a Level 3, you only pay the difference in costs between the upgrades.
If a card says “Remove one status effect” do you remove one token or all of one type?
Just one token. Each token is treated as its own discrete instance of the status effect it represents.
If a card says “Remove all status effects” do I remove only negative ones?
All means all, good or bad.
What is “Stack limit”?
Stack limit is the maximum number of tokens for a status effect that each player may have on them at any given time. e.g. Stack limit 1 means each player may have no more than 1 of that status effect on them.
If an opponent attempts to steal or remove a spendable status effect, can I spend it before it’s gone?
Yes. So long as the source of transference/removal is not an Instant Action card or spendable status effect itself. See specific Hero FAQ’s regarding certain status effects.
If an opponent’s ability does no damage but has other effects, do I get a defense roll?
No. In order to activate your Defensive ability, you must be Attacked for at least 1 point of defendable damage.
Can I reduce or avoid undefendable damage with cards and status effects?
Yes. Undefendable damage only excludes activation of a champion’s Defensive ability. The damage chart is a great reference.
If I’m doing an undefendable Attack and I use an Attack Modifier, is the added damage defendable or not?
Any added damage via Attack Modifiers is the same type as the base damage.
Can I play Attack Modifiers after my opponent’s defensive roll?
You can play them either before or after the defense roll is made.
Can I use an Attack Modifier on an ability that doesn’t do damage (like Barbarian’s Fortitude)?
No. In order to use Attack Modifiers the ability must be an Attack that would deal at least 1 damage.
Does collateral damage automatically hit everyone?
No. Collateral damage is undefendable damage that cannot be enhanced. It has special targeting rules. It does not count as an Attack.
In team games, if an Attack says to damage all opponents, do I do damage to each champion individually, or each Health pool?
Heroes in team games share a single Health dial between them. Damage to all opponents damages each champion individually (e.g. In a 2v2 game, 2 damage to all opponents equals 4 damage to your opponent’s shared Health dial).
Can I activate multiple abilities if I roll the right symbols?
Do I have to activate an ability during my Offensive Roll Phase?
No. Sometimes choosing not to Activate an ability is a valid strategy.
If I roll once, choose to keep one or more dice and roll the others, can I re-roll the dice I kept from my 1st roll on my 3rd roll?
Yes. Your dice are not locked in.
If I don’t use all my Roll Attempts and I decide to stop rolling to activate an ability but my opponent changes or makes me re-roll, can I then use my unspent Roll Attempts?
Yes. You always have 3 Roll Attempts. Unless an in-game effect reduces your Roll Attempts.
On my defense roll, do I activate everything I roll, or do I spend dice to activate different parts?
You do everything. Your dice are never “spent”, so one die might be used in multiple combinations on a defensive roll.
How do you determine who takes damage first when both players are damaging each other? Does damage happen before Healing?
All damage and Healing accumulate and resolved simultaneously on both players at the end of the phase unless otherwise noted.
What if we both hit hp at the same time due to defensive damage or status effects?
You both die at the same time. It’s a draw.
In a King of the Hill game can I change my opponents offensive roll with a card after he decides who he is targeting?
No. If you want to modify your opponent’s dice (like trying to stop an Ultimate from happening) you need to do so in their Offensive Roll Phase before they Activate the ability and before Targeting.
What is pure damage?
Undefendable damage that is considered an Attack that is not enhanceable but is preventable.
Can Blind , Shadows , Wither , or any other status effect or card reduce or prevent an Ultimate’s damage or other effects?
No. No status effects or cards can stop an Ultimate. In fact, you can’t even respond to the Ultimate. No Healbot, no instant cards, no blocking any damage or effects in any way whatsoever, no Back Strike or Retribution . If an Ultimate is activated, put down your cards, pick up your Health dial, and ask “how much damage?
How do I stop an Ultimate?
Alter your opponent’s dice during their Offensive Roll Phase before the ability is Activated.
Can I use Attack Modifiers to increase my own Ultimate Ability damage?
Yes. An Ultimate is Enhanceable.
In a 2v2 game can my opponent alter my Targeting Roll if I roll an Ultimate?
No. But if you activate an Ultimate you may change the Targeting Roll result with cards or effects.
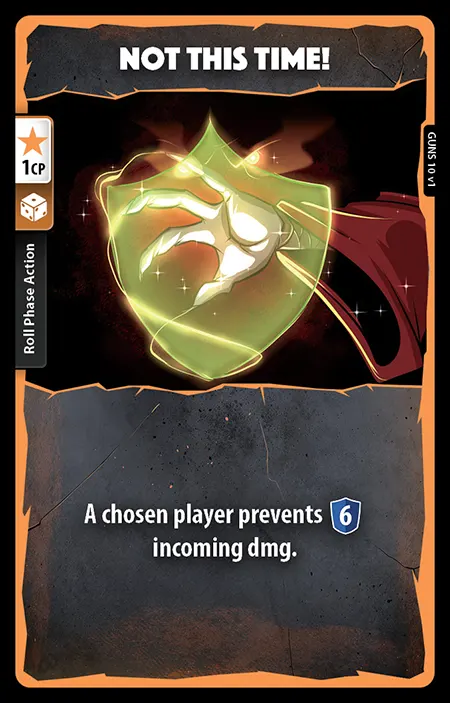
Can I use “Not this Time” to prevent damage from an Ultimate?
No.
Can I play Six-it or Samesies on my opponents dice?
No. Both cards state you may change the value of one of your dice.
What happens if I run out of cards in my deck?
The rulebook states that if you need to draw a card but your deck is empty, shuffle your discard pile to create a new deck first.
Do I remove all tokens of all types when “What Status Effects” is played?
Yes.
Can I use “One More Time” to force my opponent to take an additional Roll Attempt during their Offensive Roll Phase?
No. The card states “A chosen player may perform an additional Roll Attempt…” They are not forced to.
Can I use “Better D” to force my opponent to take an additional Roll Attempt during their Defensive Roll Phase?
No. The card states “ A chosen player may perform an additional Roll Attempt…” They are not forced to.
Can I use “Try, try again” to force my opponent to take an to re-roll up to two dice?
No. you cannot play it on an opponent. The card states “you or a chosen teammate…”
Can I play “Double up” or “Triple up” during my opponents turn and have more than my 6 card limit?
Yes. You must have 6 or fewer cards in your hand at the conclusion of your Discard Phase.
When I sell a card how much do I gain?
The rulebook states that you gain per card sold. Not the value of the card.
What is Dice Throne Adventures?
Dice Throne Adventures is a genre-bending cooperative expansion for Dice Throne. You can take 1 to 4 Heroes and delve into randomly generated worlds, beautiful environments, intense boss battles, innovative Diablo-inspired loot, and non-destructive legacy elements.
If it is ever unclear what choice a Minion or Boss should make, what happens?
The Active Player should make the most effective decision for the Minion or Boss.
Can a Hero Heal above their starting Health?
Can I spend Bonus Damage tokens after my opponent has already activated their Defensive Ability?
Yes. Bonus Damage tokens are Attack Modifiers, which may be spent before or after the opponent Activates their Defensive Ability.
During a campaign, what is the stack limit for King’s Hand ?
Infinity.
Do I go directly into the Boss Battle after going through the Boss Portal tile?
No. First you go to Rosella’s Shop and you have to reset your Hero board.
Can the King’s Hand dice roll be manipulated with applicable Hero’s Roll Phase cards?
Yes.
Are my Hero’s upgraded Ability cards and Equipment cards carried over from scenario to scenario?
No, you always return all cards to your deck after each session.
If my team was victorious and had Salves remaining, would they carry over to the next scenario?
Yes.
If my team lost and we had Salves remaining, do these carry over when we replay the scenario?
No, these are not added to your Starting Salves for your replay of the same scenario.
What happens if I run out of cards in a Loot deck?
Draw from the next highest rarity Loot deck instead.
Action Cards
Action cards (identified by a icon) are single use cards that provide a benefit. Action cards may be played at different times, depending on their color.
To Play an Action Card
- Spend the required (shown on the left side of the card).
- Perform the described action and then place the card onto your Discard Pile.
-
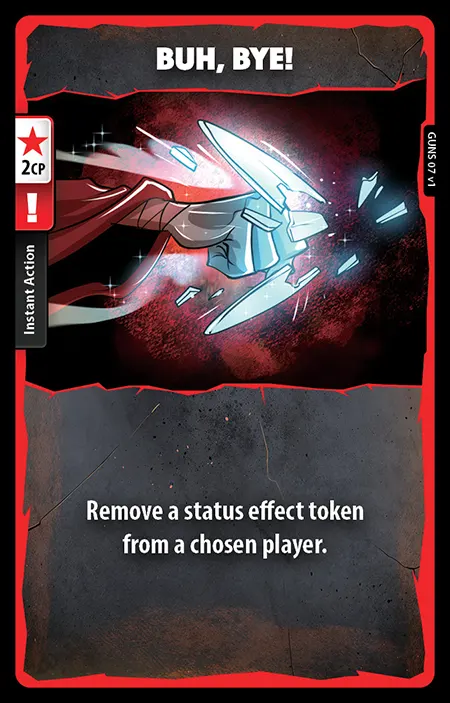
Instant Action
-
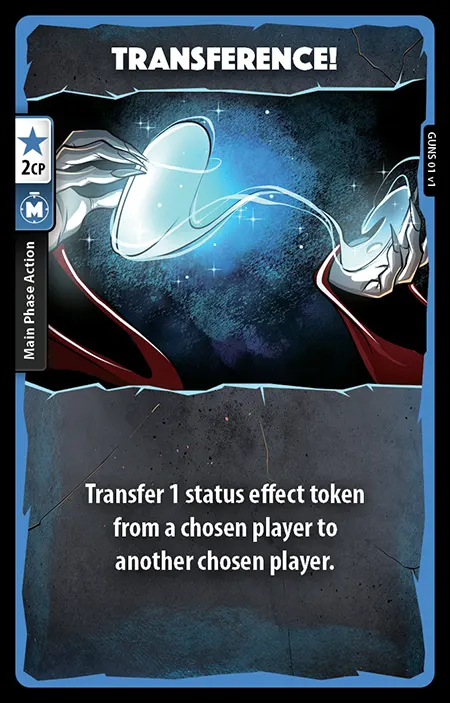
Main Phase Action
-
Roll Phase Action
Instant Action Cards
Identified by a red border and a icon.
May be played at any time, during any player’s turn (as indicated by the icon on the left side of the card).
May be played to interrupt actions or abilities (except other Instant Action cards), and are resolved immediately. The interrupted action or ability completes afterward.
Instant Action cards cannot be interrupted.
Main Phase Action Cards
Identified by a blue border and a icon.
Only playable on your own turn, during Main Phase (1) or Main Phase (2) (as indicated by the icon on the left side of the card).
Roll Phase Action Cards
Identified by an orange border and a icon.
May only be played during an Offensive Roll Phase, Defensive Roll Phase, or Targeting Roll Phase (as indicated by the icon on the left side of the card).
May be played during any player’s turn.
Attack Modifiers
Any card or Status Effect that modifies an Attack is considered an “Attack Modifier.”
They can be played before or after the Defensive Ability is activated.
Damage added by Attack Modifiers is considered to be of the same damage type as the original damage being dealt.
Attack Modifiers can only be used on Attacks (i.e. an Offensive Ability that targets an opponent with at least dmg).
Combat Points
CP Dial
Combat Points (CP) are spent to play cards and Activate abilities from your Hero Board.
You can have a maximum of . If you gain CP while you are already at , do not increase your CP Dial.
At the start of your Income Phase, increase your CP Dial by .
Important: In a 1v1 game, the Start Player must skip their first Income Phase.
Companions
Some heroes have Companions, which are represented by tokens, dials, or other custom components. Companions are not Status Effects, and are therefore immune to cards and abilities that alter Status Effects.
Companions feature custom rules on the Hero Leaflet. They cannot be removed, transferred, or destroyed, unless otherwise specified in the Companion’s ruleset.
Damage Types
The current amount of damage waiting to be dealt to a player is considered “incoming damage”.
There are 5 damage types: normal (denoted as simply “dmg”), undefendable, pure, collateral, and ultimate.
Damage Type Attributes
Each damage type has one or more of the following attributes:
Defendable - If the damage is the result of your opponent’s Offensive Ability, you may perform your Defensive Ability.
Avoidable - Can be reduced, prevented, avoided, or interrupted by cards and/or Status Effects.
Enhanceable - Can be improved with Attack Modifiers.
Special Targeting Rules - The player to receive the damage is specified in the description. No Targeting Phase is necessary to determine who will receive this damage.
Normal Damage
This is the most common type of damage, denoted by a black circle with a number in it (e.g. ) followed by “dmg”.
Defendable, Avoidable, and Enhanceable.
No Special Targeting Rules
Undefendable Damage
Another common type of damage denoted by a red circle with a number in it (e.g. ) followed by “undefendable dmg”.
Not Defendable, but it is Avoidable (with cards / Status Effects).
Enhanceable.
No Special Targeting Rules.
Pure Damage
A special type of undefendable damage denoted by a red circle with a number in it (e.g. ) followed by “pure dmg”.
Not Defendable, but it is Avoidable.
Not Enhanceable.
No Special Targeting Rules.
Collateral Damage
A special type of undefendable damage denoted by a red circle with a number in it (e.g. ) followed by “collateral dmg”.
Not Defendable, but it is Avoidable.
Not Enhanceable.
Has Special Targeting Rules (specified on the ability/card).
Does not qualify as an Attack since it does not directly target.
When dealt to multiple players of the same team at the same time, reduce the Health Dial by the combined total dealt.
Ultimate Damage
A special type of undefendable damage dealt by your Ultimate Ability.
Denoted by a red circle with a number in it (e.g. ).
Not Defendable or Avoidable.
Enhanceable.
No Special Targeting Rules.
The Gunslinger’s Ultimate Ability
Defensive Roll Phase
- Dice Throne Turn, Phase 6
If the Active Player’s Offensive Roll Phase results in an Attack, then the Defender now begins the Defensive Roll Phase.
Resolve any effects from the Offensive Ability that require a target and are not damage related (e.g. gain Evasive , inflict Bounty , steal , etc).
-
If the Offensive Ability results in an Attack and if that Attack’s damage type is defendable, the Defender may activate their Defensive Ability.
Note: Most heroes only have 1 Defensive Ability. However, if a hero has 2, they must choose one now.
Defender performs one Roll Attempt with the indicated number of dice (e.g. means roll 1 die).
Based on the dice results, the Defender resolves all non-damage effects (e.g. gain Synth , inflict Shame , gain CP, etc).
There is one last opportunity for any player to spend Status Effects or play cards.
-
Finally, all damage, prevention, and/or healing effects are accumulated and are applied simultaneously at the conclusion of the Roll Phase.
Note: If all remaining players are simultaneously reduced to 0 health, the game is a draw.
Discard Phase
- Dice Throne Turn, Phase 8

Final DMG Total
Occasionally, calculating a Final Total of damage (the amount you reduce your health dial by at the conclusion of the roll phase) can become complex when the Incoming Damage of the attack is affected by your Defensive Ability, cards, and status effects played by you and your opponent.
Luckily, you can easily calculate the Final Total by following the steps below, in the order shown, after both players are completely finished taking actions:
-
Determine incoming damage
Incoming Damage is the amount of Damage that is waiting to be dealt to you at any point during the game. Most frequently this damage comes from Offensive and Defensive abilities, but Incoming Damage can also come from status effects like Pyromancer’s Burn or Shadow Thief’s Poison .
-
Add & Subtract (subtotal)
We now apply anything that used addition or subtraction to affect Incoming Damage. Defensive Abilities, status effects, or cards that would subtract (prevent) or add a specific amount of damage are applied to Incoming Damage during this step. The result is called the Incoming Damage Subtotal.
-
Multiply & Divide (Final Total)
Finally, calculate anything that affects Incoming Damage using multiplication or division. All division and multiplication is applied at the end, regardless of what order cards, status effects, or Defensive Abilities were activated.
Also, in the case that you need to calculate more than one multiplier, each multiplier is calculated independently using the original Incoming Damage Subtotal determined by Step 2.
Anything else that uses Incoming Damage as part of a multiplication or division calculation (e.g. Paladin’s Retribution status effect) is also calculated at this time.
Barbarian vs Paladin Example
Below is an example of a series of events that transpire during the Offensive and Defensive Roll Phase between the Barbarian (attacking) and the Paladin (defending).
Barbarian activates his Overpower Offensive Ability, which will deal damage to the Paladin.
Paladin spends his Retribution status effect, which will deal half of the Incoming Damage back to the Barbarian.
Paladin spends his Protect status effect, which will prevent of the Incoming Damage.
Paladin activates his Divine Defense III ability, which will prevent dmg. He also gains another Protect .
Barbarian plays his Get Some Attack Modifier card which inflicts Concussion and adds dmg.
Paladin plays Absolution card which will prevent dmg.
Paladin spends his other Protect status effect which again will prevent of the Incoming Damage.
A lot of stuff just happened. Let’s calculate damage:
-
Determine incoming damage
Incoming Damage from Barbarian’s Overpower (Event 1, above).
-
Add & Subtract (subtotal)
Incoming Damage (Event 1 - Overpower)− dmg (Event 4 - Divine Defense III)dmg (Event 5 - Get Some)− dmg (Event 6 - Absolution)
Incoming Damage (Subtotal) -
Multiply & Divide (Final Total)
Determine the value of each multiplier simultaneously and independently (Note: all division in Dice Throne is always rounded up):
Event 2 (Retribution ) = (Subtotal) ÷ 2 = dmg
Event 3 (Protect ) = (Subtotal) ÷ 2 =
Event 7 (Protect ) = (Subtotal) ÷ 2 =Then apply all of this to the Subtotal:
Incoming Damage −− = −1 Incoming Damage
Using Protect twice, Paladin prevents all damage, which means the Final Total of damage the Paladin receives is .
Additionally, the Barbarian will receive dmg in return since the Paladin spent his Retribution token (Event 2).
Other Game Modes
King of the Hill
Apply the following rule changes:
Your starting Health depends on the number of players:
- 3 Players — 35 Health each
- 4 Players — 25 Health each
- 5 Players — 20 Health each
Roll to determine the Start Player.
Players take turns in a clockwise order.
When Attacking, you may target any player desired. However, you receive a bonus card if you choose to Attack the Leader.
The player(s) with the most Health remaining are considered the Leader(s).
If you target a Leader with an Attack, you draw card from your deck. The card draw happens immediately after choosing your target (before any other effects occur).
If you Attack an opponent who is tied with you for the lead, (e.g. you and another player both have 30 Health), you still draw bonus card.
If you are the only Leader (i.e. you alone have the most Health), you cannot earn a bonus card.
2v2 Teams
2v2 teams turn order
When playing with 4 players, apply the following rule changes:
The game is played in teams of two.
Teammates sit next to each other and are encouraged to view each other’s hands & strategize.
Roll to determine the Start Player.
Turn order alternates between teams in a zigzag pattern.
Teammates share one Health Dial beginning with 50 health.
The Start Player skips the Income Phase of their first turn.
When one teammate receives damage, reduce the shared Health Dial by the corresponding amount. If both teammates take damage at the same time, reduce the Health Dial by the combined total of damage taken by both teammates.
Teammates still have their own individual CP Dials. A player’s may only be spent on their own cards and abilities.
Players cannot intervene to reduce their teammate’s incoming damage unless specified by a card/status effect (e.g. the card ‘Not This Time!’ can be played on teammates because it refers to “A chosen player”).
Players may alter dice to prevent a teammate from taking damage in the first place or to improve their dice outcome.
Targeting Roll Phase
When selecting a target for an attack in Targeting Roll Phase, determine the Defender who will be receiving the damage based on the result of your die roll:
- 1–2
- Target the opponent on your left.
- 3–4
- Target the opponent on your right.
- 5
- Your opponents choose which of them you target.
- 6
- Choose either opponent as your target.
3v3 Teams
3v3 teams turn order
When playing a 3v3 game with 6 players, apply the following rule changes to a 2v2 team game:
The game is played in teams of three.
Teammates sit next to each other and are encouraged to view each other’s hands & strategize.
Roll to determine the Start Player.
Turn order alternates between teams in a zigzag pattern.
Teammates share one Health Dial beginning with 50 health.
Targeting Roll Phase
When selecting a target for an attack in Targeting Roll Phase, determine the Defender who will be receiving the damage based on the result of your die roll:
- 1–2
- Target the opponent on the left.
- 3–4
- Target the opponent in the middle.
- 5–6
- Target the opponent on the right.
2v2v2 Teams
2v2v2 teams turn order
When playing a 2v2v2 game with 6 players, apply the following rule changes to a 2v2 team game:
The game is played in teams of two.
Teammates sit 3 seats away from each other and are encouraged to view each other’s hands & strategize.
Roll to determine the Start Player.
Player 1 from from each team completes their turn followed by the Player 2 from each team.
Teammates share one Health Dial beginning with 50 health.
Targeting Roll Phase
When selecting a target for an attack in Targeting Roll Phase, determine the Defender who will be receiving the damage based on the result of your die roll:
- 1–4
- Count around the table moving clockwise starting with the closest opponent on your left.
- 5–6
- Choose an opponent as the target.
Health

Health Dial
The moment your health is reduced to 0, you have been defeated.
If all remaining players are simultaneously reduced to 0 health, the game is a draw (an opponent cannot be ‘more dead’ than you).
You may heal a maximum of 10 points above your starting health.
Heal
Increase your Health Dial by the specified amount (e.g. Heal ).
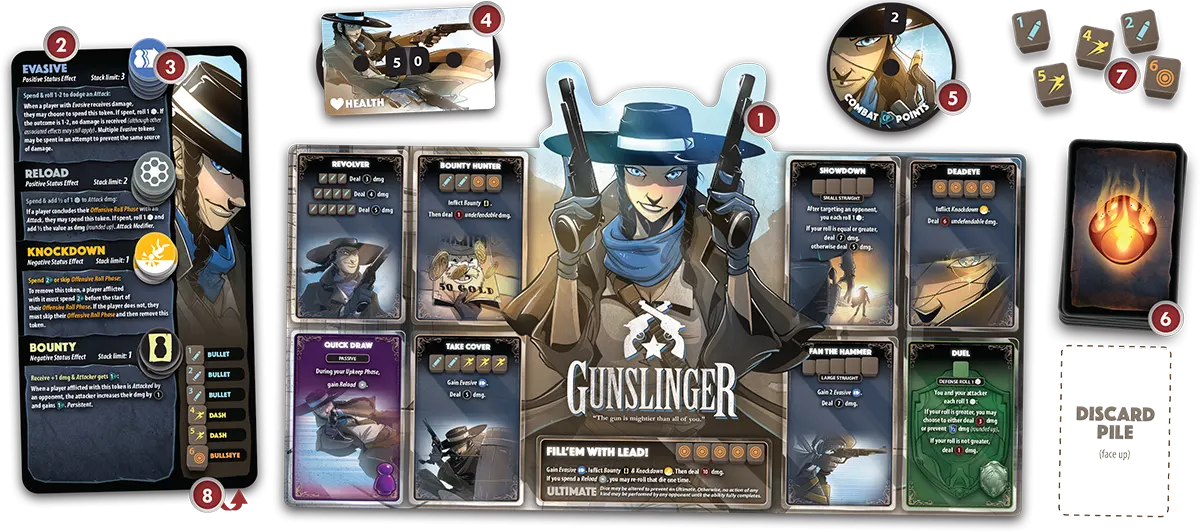
Hero Board
Offensive Ability
- May be Activated at the end of your Offensive Roll Phase.
- You may only activate a single ability as the result of your Offensive Roll Phase.
Activation Requirement
The Final Dice Result required to activate an Offensive Ability.
-

Activation Requirement
Offensive Abilities generally require a specific set of symbols to activate.
-

Small Straight
Small Straight abilities require any 4 sequential numbers in a row (e.g. 2,3,4,5) and are represented by 4 escalating dice.
-

Large Straight
Large Straight abilities require any 5 sequential numbers in a row (e.g. 1,2,3,4,5) and are represented by 5 escalating dice.
Passive Ability
- Always active and/or available for use.
Ultimate ability
Your hero’s most powerful attack! If activated, the effects are completely unstoppable.
Important: The damage and effects of an Ultimate Ability can be enhanced, but cannot be reduced, prevented, avoided, responded to, or interrupted by anything (e.g. cards, Status Effects, Companions, etc). Opponents may take no action of any kind from the time it is Activated until the conclusion of the Roll Phase. The only way to prevent an Ultimate Ability is to alter a die roll before its activation.
Ability Description
- The effects to be resolved when an ability is Activated.
- Dice rolled as part of the ability’s effects may apply multiple times during the resolution of the ability.
Defensive Ability
- Activated when you are Attacked by an opponent.
- If you have the choice of more than one Defensive Ability, choose one before rolling your dice.
- The Defensive Ability is not activated if the incoming damage type is undefendable, pure, collateral, or is the result of an opponent’s Ultimate Ability.
Defensive Dice
- The number of dice you roll when activating your Defensive Ability.
- For example, means the Gunslinger rolls 1 die during her Defensive Roll Phase.
- These dice are only rolled a single time.
Hero Cards


There are two types of cards: Hero Upgrade cards and Action cards.
During your Income Phase, you draw a card from your deck. If you need to draw a card, but your deck is empty, shuffle your Discard Pile to create a new deck first.
Playing cards costs Combat Points . This cost is indicated on the left hand side of the card. Cards costing are free to play.
You must conclude your Discard Phase with no more than cards in your hand. If you reach the Discard Phase with more than this, you must sell cards until you have or fewer. To sell a card, discard it and increase your CP Dial by (all cards are worth when sold, no matter how much it costs to play).
The phase during which a card may be played is indicated by the symbol on the left hand side of the card.
Hero Leaflet
Status Effects and Companions: Rules for your hero’s Status Effects & Companions.
Dice Key: The symbols on each face of the hero’s dice.
Complexity Rating: A value between 1
 and 6
and 6  that measures how difficult a hero is to play. Higher complexity heroes often take more time to master and require good strategy to play effectively.
Hero Setup: Some heroes require additional setup steps before the game begins.
Frequently Asked Questions: The answers to questions about complex rules for this hero.
Hero Upgrades
Hero Upgrade cards permanently upgrade the space with the same name on your Hero Board. Identified by a icon on the left side of the card.
Offensive Ability upgrades have a white border, Defensive Ability upgrades have a green border, and Passive Ability upgrades have a purple border.
Hero Upgrade cards…
may only be played during your Main Phase (1) or Main Phase (2).
may not be sold after they have been played.
may be upgraded directly to level III. If upgrading an already upgraded ability (i.e. upgrading from level II to level III), play the new card over the top of the previous Hero Upgrade and pay only the difference in cost between the upgrades.
To Play An Upgrade Card
- Spend the required (shown on the left side of the card).
- Place the card onto the space of your Hero Board with the same name.
Income Phase
- Dice Throne Turn, Phase 2
Increase your CP Dial by (skip this step if you already have the maximum of ).
Draw card from the top of your deck and add it to your hand. If your deck is empty, shuffle your Discard Pile to create a new deck.
Important: The Start Player skips the Income Phase of their first turn except for Minion Battles, Boss Battles, and Boss vs Many mode.
Main Phase
- Dice Throne Turn, Phases 3 & 7
Perform any of the options below in any order, and as many times as you like:
-
Sell any card
Place card from your hand onto your Discard Pile.
Increase your CP Dial by (all cards are worth when sold, no matter how much it costs to play).
-
Play Main Phase Action cards
Reduce your CP Dial by the cost shown on the left side of the card.
Perform the described action(s).
Place the card onto your Discard Pile.
-
Play Hero Upgrade cards
Reduce your CP Dial by the cost shown on the left side of the card.
If you are upgrading from level II to level III, only pay the difference in cost.
Place the card onto the correspondingly named space on your Hero Board.
Offensive Roll Phase
- Dice Throne Turn, Phase 4
During this phase, any player may choose to play Roll Phase Action cards after any step listed below.
-
Perform up to 3 Roll Attempts:
Roll all 5 of your dice.
Optional: reroll any number of dice.
Optional: for a second time, reroll any number of dice.
-
When you are satisfied with your roll, you may either:
Announce the Offensive Ability that you intend to Activate (your Final Dice Result must meet its Activation Requirement). Ask your opponent if they would like to alter your dice or allow the ability to activate successfully.
-
Announce that you are not going to Activate an Offensive Ability at all.
Tip: Activating a weak Attack against an opponent with a powerful Defensive Ability is not always advisable.
-
If you, a teammate, or an opponent have altered any of your dice at this point (e.g. someone played ‘Twice As Wild’), you may either:
Announce a different Offensive Ability based on the new Final Dice Results.
Return to step of the Offensive Roll Phase and use any remaining unused rerolls.
-
Activate the Offensive Ability (if one was chosen):
Determine its variable effects (some abilities require additional steps to determine their full effects).
Resolve any effects that do not require a target (e.g. gain Evasive , gain Back Strike , Heal , etc).
Resolving Text
“Roll [#] ”
Roll the indicated number of dice a single time, then resolve the effects that follow. Dice rolled previously cannot be used to resolve the listed effects.
Multiplication (e.g. “4 ×  ”)
”)
Multiply the [number] by the [quantity] of your dice displaying the symbol to determine the total.
“On [symbol]”
If your roll contains the symbol shown , you get the listed benefits . However, you only get these benefits once, even if your roll contains the required result multiple times.
“Then”
You may spend Status Effects and play Instant Action cards or Roll Phase Action cards at the point of a ‘Then’ statement. The effect following a ‘Then’ statement is performed after the effects that came before it.

“Or”
When statements are separated by an “or”, you may resolve only one of the options.
“Steal”
Take the indicated resource from your opponent and give it to yourself.
When stealing Health/, increase your Health/CP Dial and reduce their dial accordingly.
If your opponent does not have the specified amount, Steal as much as they have.
Additionally
Statements following an “Additionally” resolve after the other listed effects.
Status Effects
Each hero has a unique set of Status Effects listed on their hero leaflet, represented by tokens. If you need more tokens than are provided, represent them with something else.
Positive or Negative Status Effects can be gained or inflicted on yourself or other players. Status Effects are usually gained or inflicted through cards or Offensive Abilities.
When you gain or inflict a Status Effect, take the corresponding token from your Hero Leaflet and place it in the middle of the receiving player’s Hero Board. This Status Effect is now considered to be “in play”. If a player is defeated, Status Effects they inflicted on other players remain in play.
Removing Status Effects
When a Status Effect is removed, return the token to the appropriate space on its Hero’s Leaflet. When using cards or abilities that remove a specific number of Status Effects, remove that many tokens.
Spendable Status Effects
Some Status Effects are removed when you spend them. Unless otherwise specified, you may spend these status effects at any time during any phase of any player’s turn and their effects are immediate.
Persistent Status Effects
A Status Effect marked as “Persistent” remains in play until the end of the game, or until a card or ability causes its removal.
Stack Limits
Many Status Effects can be applied multiple times to a hero, creating a stack of them. The Stack Limit represents the maximum number of tokens of a particular Status Effect that can be on a single Hero Board at a given time (e.g. a Status Effect with a Stack Limit of 2 can have a maximum of 2 tokens on each Player).
Increasing Stack Limit
If a player increases the Stack Limit of a Status Effect, the increase only applies to that player, and lasts for the duration of the game.
Unique Status Effects
These fundamentally break the standard Status Effect rules (explained in their description). Unique Status Effects often have a custom shape and/or size.
Interrupting Status Effects
If a Status Effect is spent, its effects cannot be interrupted.
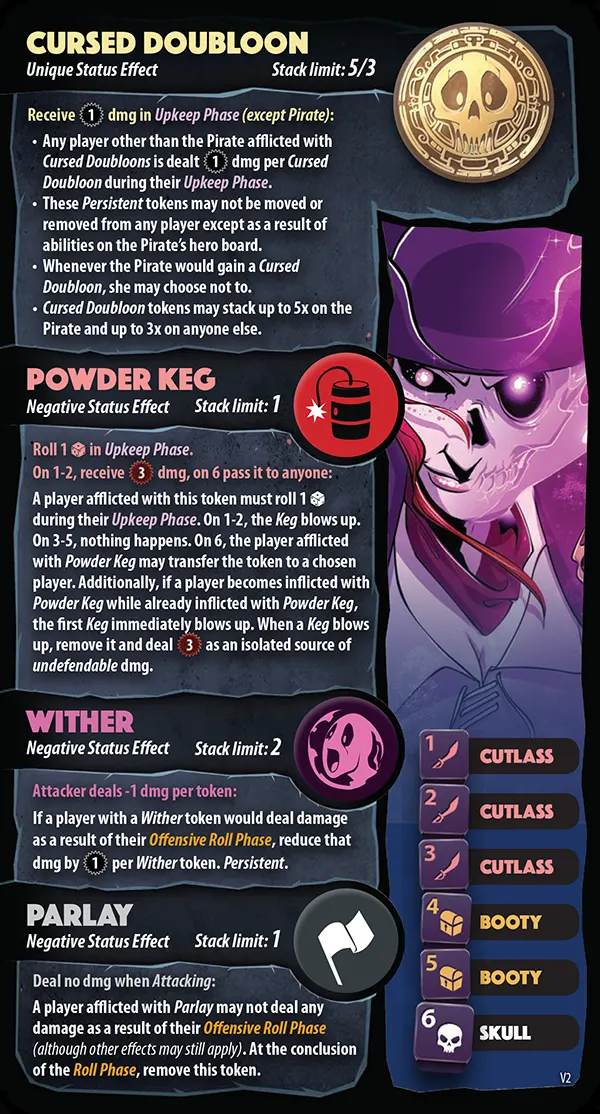
Cursed Pirate has inflicted a Powder Keg and two Wither Status Effects on the Gunslinger. Wither is marked as Persistent in the Status Effect description, so it will remain on the Gunslinger’s Hero Board until the Gunslinger is able to remove it. Wither has a Stack Limit of 2, allowing the Cursed Pirate to inflict it twice on the Gunslinger.
Targeting Roll Phase
- Dice Throne Turn, Phase 5
If you have more than one opponent, you must determine your target.
In King of the Hill variants, simply choose an opponent to target. In Team vs. Team variants, roll 1 to determine the target.
Note: Targeting an opponent still applies even if you have activated an ability that does no damage, but has effects that must be reconciled (e.g. ‘Mark the Target’ inflicts Bounty ).
Timing Conflicts
When multiple players perform Instant Actions that cause confusion as to whose action is resolved first, the player whose turn it is has priority, regardless of who initiated their action first. And remember, spending a status effect token is considered an Instant Action.
For example, if your opponent wants to avoid your Attack by spending an Evasive token, and then you play a Buh Bye (Instant Action card) to remove your opponent’s Evasive , your card would resolve first, because it’s your turn.
Conversely, if your opponent has a Reload token when they Attack you, and you attempt to play a Buh Bye card to remove it, they may still spend that Reload token successfully (because it’s their turn) and your Buh Bye card may not be played to remove that token or any other tokens played by the Attacker.
The player whose turn it is takes precedent regardless of how many instants a player desires to use during an interaction.
Cards/abilities that are not considered “instant” are interruptable. For example, when you play a What Status Effects card (Main Phase Action), your opponent may still spend valid status effects before the card resolves completely (e.g. Tactical Advantage , Nyra’s Bond , etc).
Note: When playing with more than two players, the player whose turn it is has first priority, followed by subsequent players in turn order. After all interruptions are complete, the previous order of play continues normally.
Upkeep Phase
- Dice Throne Turn, Phase 1
Determine if any of your Status Effects or abilities activate during your Upkeep Phase. Then resolve these effects (note: this will not be applicable for most heroes during the beginning of the game).
If there are multiple effects, the Active Player may choose the order in which they are resolved.
All damage and/or healing effects are accumulated and are applied simultaneously at the conclusion of the phase.
2/3/4/5-of-a-kind
When the dice show the same number (not symbol) 2/3/4/5 times.
Ability
An Ability is printed on the hero board, minion card, or boss board. See each different ability description for more information.
Activate
Some Abilities, Status Effects, and Companions may be activated when their Activation Requirement is met.
Activating Offensive and Defensive Abilities
Once a Final Dice Result is determined, a player may activate an Offensive or Defensive Ability.
Determine its variable effects (some abilities require additional steps to determine their full effects).
Resolve any effects that do not require a target (e.g. gain Evasive , gain Back Strike , Heal , etc).
Activation Requirement
This term is used in several places throughout Dice Throne. In regards to board abilities, the Activation Requirement is the die faces required to Activate the ability. In regards to status effects or companions, the Activation Requirement will vary based on the description of each. Please read each ability, status effect, or companion description carefully to understand each Activation Requirement.
Active Player
The player who’s turn it currently is.
Attack
An Attack is an Offensive Ability that deals at least dmg that targets an opponent (i.e. not collateral dmg).
Defender
The player who is being targeted by an Attack.
Defensive Ability
Abilities that can be activated by a hero during their Defensive Roll Phase if their opponent has activated an Offensive Ability that deals Normal Damage.
Defensive Abilities are denoted by an ability name and number of dice used for the ability over a green shield background.
Final Dice Result
The result of your five dice after all Roll Attempts and dice modifications are finished.
Gain
For Status Effects, take the corresponding token and place it on the middle of your Hero Board. For Health or , increase your Health or CP Dial by the specified amount.
Inflict
Take the Status Effect’s corresponding token and place it in the middle of the receiving player’s Hero Board.
Large Straight
5 of your dice show a sequence of numbers (i.e. 1,2,3,4,5 or 2,3,4,5,6).
Offensive Ability
Abilities that can be activated by a hero, minion or boss during their Offensive Roll Phase.
These abilities are denoted with an ability name and the Activation Requirement (Final Dice Result) needed to activate that ability.
Only one Offensive Ability can be activated during a player's Offensive Roll Phase.
Passive Ability
Some characters have a Passive Ability, denoted on the board with an ability name and the effect of the ability. Passive abilities will describe their effects on the ability, and vary in how they are used. Please read each passive ability carefully.
Roll Attempt
A dice roll performed by the player to Activate an Offensive or Defensive Ability.
Roll Phase
Any or all of: Offensive Roll Phase, Targeting Roll Phase, and Defensive Roll Phase.
If an ability references “the conclusion of the Roll Phase,” this occurs just before Main Phase (2) begins.
Sell
Take a card from your hand, place it onto your Discard Pile, and then increase your CP Dial by .
During a Main Phase, you may sell any number of cards from your hand.
During the Discard Phase, you must sell cards from your hand, until you have or fewer cards.
Small Straight
4 of your dice show a sequence of numbers (i.e. 1,2,3,4 or 2,3,4,5 or 3,4,5,6).
Spent/Spend
If a Status Effect is Spent, you discard the token and receive the benefit. This has no cost. You may gain this Status Effect token again later in the game.
Ultimate Ability
Each hero and boss has an Ultimate ability that can be activated only during the Offensive Roll Phase, requiring five 6's to activate.
Opponents can use dice-modifying cards to prevent the Ultimate from being activated, but may take no other actions of any kind if the activation is successful. This means that no cards may be played, no status effects may be used, no companions may be activated, no Defensive Rolls may be taken, or any other action.
Artificer

To underestimate the Artificer is to invite destruction by a cold & calculated robotic assault. His deranged love for metallic tools-of-destruction is second only to his desire to see all combatants reduced to nothing.
Weapon of choice: Robot Army
Tokens
Rule Clarifications
Synth
Synth gained from your Offensive Roll Phase or Defensive Roll Phase can be spent the turn it is gained to activate a Bot (such as the Healbot during the Defensive Roll Phase).
Synth is spent as an Instant Action. If your opponent somehow gets 2 or more Synth , they cannot build Bots (only the Artificer can build Bots).
Building Bots
Bots are Companions and are not status effects.
A Basic Bot requires spending 2 Synth to activate, and an Advanced Bot can be activated by spending just 1 Synth .
You must build a Basic Bot before upgrading to an Advanced Bot. After a Bot is built, it cannot be removed or destroyed.
Activating Bots
The activation limit is how many times it can be used during the respective phase on its leaflet.
When text reads “ignore normal activation requirements”, it means that you Activate any built Bot without spending Synth .
You get a free use with any Built Bot and ignore the activation limit (Shock Bot still can never be activated more than once per turn).
Heal bot
Heal bot can be activated if the incoming damage from an Attack is undefendable but never in response to an Ultimate Ability.
It cannot be used if the Artificer is receiving collateral damage or receiving damage from an opponents defensive ability. The Healing from Heal Bot occurs at the end of the Defensive Roll Phase; all healing and damage are accumulated and resolved simultaneously.
Nanobot and Shock bot
The damage added by a Shock Bot or a Nanobot is not a separate instance of damage and is accumulated with all other damage dealt during the respective phase. The damage type (normal/undefendable) matches that of the Offensive Ability that was activated.
Barbarian

The Barbarian isn’t the most elegant hero around. He loves to smash things. He is known for hitting his opponents so hard, they are left stunned and concussed. His endless barrage of heavy-hitting attacks shows that even the most simple fighting style can be deadly.
Weapon of choice: Anything that goes chop or smash
Tokens
Rules Clarifications
Stun
While you are stunned, you cannot take any actions of any kind. Even if your opponent has an ability, status effect, or card that could prevent an incoming status effect, Stun is inflicted before any damage is dealt. However, a teammate who is not stunned could perform actions to remove Stun (unless the Stun was inflicted from your Ultimate, in which case no opponent can perform any action).
Once you remove the Stun token and start a new Offensive Roll Phase, your opponent is no longer stunned and may act normally.
Overpower
Cards can be used to manipulate the three dice when calculating the damage of the ability. However, once the value is locked in, you cannot go back to change the outcome.
Thick Skin
All damage, prevention, and healing is applied simultaneously at the conclusion of the Roll Phase. For Thick Skin II, if you would become inflicted with a status effect that you are already inflicted with (such as Blind ), you will prevent the second incoming status effect (such as Blind ) and would still be inflicted with the first one. The initial status effect was already in place before the Defensive Ability was activated and is not removed.
Head Bash
This card can only be played after damage calculation, if your opponent successfully received at least points of damage. No damage prevention cards or status effects can be played at this point as damage is successfully dealt.
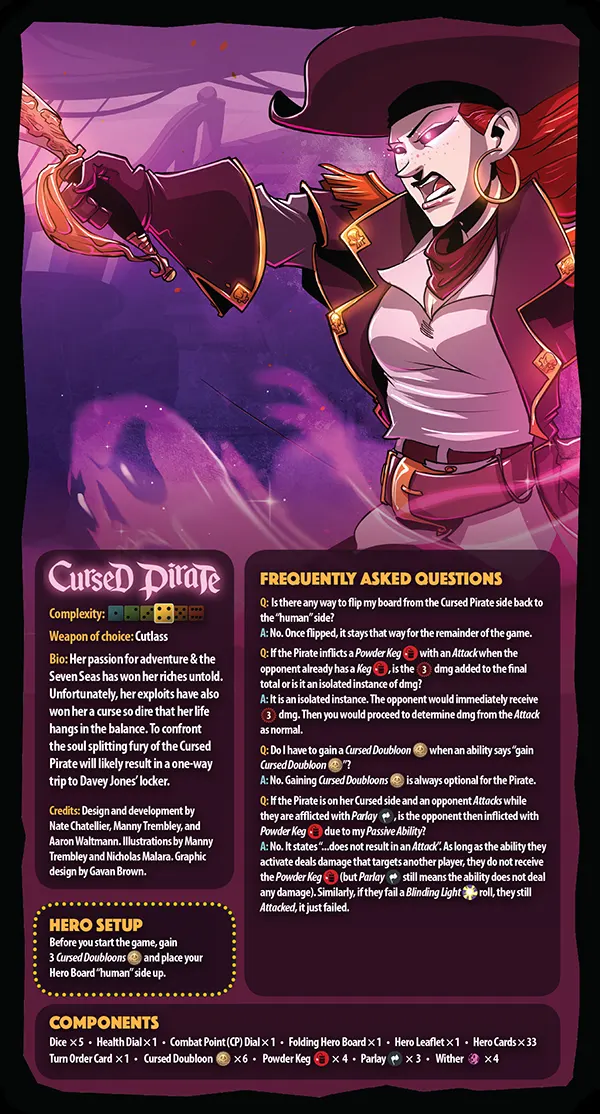
Cursed Pirate

Her passion for adventure & the Seven Seas has won her riches untold. Unfortunately, her exploits have also won her a curse so dire that her life hangs in the balance. To confront the soul splitting fury of the Cursed Pirate will likely result in a one-way trip to Davey Jones’ locker.
Weapon of choice: Cutlass
Tokens
Rule Clarifications
Hero Board
You always start on her human board. Once flipped to the Cursed board, it stays that way for the remainder of the game.
When you remove your last Doubloon you do not flip your board at the end of your turn.
The Pirate’s passive on her Cursed Side activates if your opponent activates an ability that only deals collateral damage.
Cursed Doubloon
An opponent cannot remove or transfer Cursed Doubloon with a card, status effect, or ability on their Hero board.
Pirate Mirror Match
Each Pirate’s Cursed Doubloons are considered unique to each Pirate. They will take 1 dmg if the other Pirate inflicts them with a Cursed Doubloon , and they can only remove their own Doubloons with their Shiver Me Timbers ability.
Powder Keg
If the Pirate inflicts a Powder Keg with an Attack when the opponent already has a Keg , the dmg is an isolated source of undefendable dmg.
Wither
Wither — Attack Modifier — reduces damage from normal and undefendable attacks. Does not reduce damage from collateral, pure, or ultimate attacks.
Parlay
Opponent is still considered to have done an Attack, except no defense is made and other effects still happen.
Gunslinger

Driven by the ruin brought to her family, the Gunslinger now spends her life pursuing all those who are vile and corrupt within the world. Each time she deftly reloads her twin pistols, she takes one step closer to vengeance.
Weapon of choice: Twin pistols
Tokens
Rule Clarifications
Bounty
Spending Evasive
Evasive may not be used against an Ultimate Attack since Ultimate damage cannot be prevented in any way.
Cards may be played to change the Evasive die roll as long as the card is allowed to be played during the phase you’re in.
A single Evasive token avoids all cumulative damage taken during the Phase.
If the first attempt to evade fails, you may continue to evade damage using as many tokens as you have available.
If you successfully evade normal Attack damage, you can still activate your Defensive Ability.
Reload
Can be spent any time after an Attack activates, before or after the defense roll, but before the damage is dealt.
Huntress

Rescued as an infant by Nyra (a female sabertooth tiger), the Huntress was taken in as if she was Nyra’s own cub. Their bond is beyond that of a human to her pet. They are connected–soul to soul. The ferocity and agility with which they fight intimidates all who would dare to challenge them.
Weapon of choice: Nyra
Tokens
Rule Clarifications
Nyra (pronounced “Near-ah”)
Nyra does not count as a player or opponent, she is a companion.
Nyra has a maximum of Health.
She cannot be inflicted with status effects or receive damage from status effects. She cannot receive collateral or Ultimate damage. Nyra cannot receive damage if the Huntress is Stunned.
If Nyra receives more damage than she has health, the remainder of the damage is still done to Nyra, it does not roll over to the Huntress.
If Nyra is healed on the Huntress’ defense, this Heal is netted against whatever damage Nyra is dealt. If the Huntress uses Nyra’s Bond , this instantly Heals her by 2 and does not “net” against incoming damage.
When choosing whether to pass damage to Nyra, this choice is not made until the end of the Defensive Roll Phase after all damage, Attack Modifiers, and prevention have been calculated. The Huntress is never “locked in” when deciding whether she or Nyra will receive all or some of incoming Attack damage.
Nyra’s Bond
Nyra’s Bond can be spent to heal Nyra in response to an opponent trying to remove or steal it unless the source of removal/transference is an instant action or spendable status (see Priority Rules). An opponent who steals Nyra’s Bond , cannot use it to redirect damage to Nyra. If you are playing a mirror match your opponent may spend it as normal but it still only affects their own Nyra.
Bleed
Roll for each Bleed individually.
Krampus
This holiday season, Krampus brings bad tidings and coal to all who have misbehaved. And if he wasn’t rotten enough on his own, he’s also scavenged through abandoned gifts and brought to life an army of minions. These Rejects love to support Krampus in causing great discomfort and pain!
Weapon of choice: Rejects
Tokens
Rule Clarifications
Rejects
If you have 3 Rejects and are about to draw another, you may Activate a Reject before drawing additional Rejects.
You can never Activate the same Reject more than once in a turn.
Whenever you draw 2 Rejects, you must draw both at the same time (i.e. you cannot draw 1, discard down to 3, then draw another).
When you need to draw 2 Rejects and there is only 1 available, draw the first, shuffle the discarded Rejects, and then draw the next one. You may not spend a Reject in the middle of this process.
Rejects are considered companions and are not cards that may be sold for .
You may Activate a Reject the turn you gain it.
Rejects with an Attack Modifier Activation Effect cannot be used on collateral dmg (since collateral dmg is not considered an Attack).
Sproingy’s Surprise
The Coal is counted when the card is played. If an opponent removes a Coal later during the Defensive Roll Phase, the added dmg does not change.
Defensive Ability
If you roll a 6 while activating your Defensive Ability, you may still Activate Squishy afterward without reducing the amount of damage dealt.
Activating Bitey
The Healing effect is accumulated with all other damage / prevention effects and is applied simultaneously at the conclusion of the Roll Phase.
Coal
If you have and 4 Coal during your Income Phase, the Coal is not removed since you are unable to gain additional when you already have .
Monk
The Monk is a master in the art of Chi. He can channel this ancient energy to absorb incoming attacks from his opponents. He can also use Chi to unleash a maelstrom of pain. The Monk is not only the calm before the storm but the storm itself.
Weapon of choice: Chi
Tokens
Rule Clarifications
Spending Chi
If spent when you are dealing undefendable dmg, the added Chi damage also becomes undefendable.
In a team game, Chi cannot be spent to reduce dmg dealt to a teammate (even though the damage is to your shared health pool).
Can prevent any incoming damage type except Ultimate.
Gaining Chi
If you are about to gain more Chi beyond the stack limit, you can spend some to make room for the incoming Chi (since spending status effects is an instant action), as long as Chi is not being spent to increase dmg the turn that it was gained.
Increasing Chi Stack Limit
Lasts for the remainder of the game. To keep track of your current stack limit, we recommend leaving excess Chi tokens beyond your current stack limit in your vac tray.
Spending Evasive
May not be used against an Ultimate Attack since Ultimate damage cannot be prevented in any way.
Cards may be played to change the Evasive die roll as long as the card is allowed to be played during the phase you’re in.
A single Evasive token avoids all cumulative damage taken during the Phase.
If the first attempt to evade fails, you may continue to evade damage using as many tokens as you have available.
If you successfully evade normal Attack damage, you can still activate your Defensive Ability.
Moon Elf
The Moon Elf’s damage may not match hit for hit with her opponents. However, her ability to repeatedly dodge attacks while simultaneously using the power of the moon to blind and entangle her foes, makes her a frustratingly dangerous opponent to face.
Weapon of choice: Bow & Arrows
Tokens
Rule Clarifications
Targeted
Targeted increases damage from an Attack, but does not increase pure or collateral damage. All damage is calculated simultaneously at the conclusion of the Roll Phase.
Spending Evasive
Evasive may not be used against an Ultimate Attack since Ultimate damage cannot be prevented in any way.
Cards may be played to change the Evasive die roll as long as the card is allowed to be played during the phase you’re in.
A single Evasive token avoids all cumulative damage taken during the Phase.
If the first attempt to evade fails, you may continue to evade damage using as many tokens as you have available.
If you successfully evade normal Attack damage, you can still activate your Defensive Ability.
Blind
Blind cannot stop an Ultimate Ability. However, after the Ultimate completes, the Blind token is still removed.
On a roll of 1–2, all effects of an Offensive Roll Phase are prevented.
Missed Me
If you roll ![]()
![]()
![]()
![]() , you do not get to cut damage in half twice, since the ability states “On” instead of “for every”.
, you do not get to cut damage in half twice, since the ability states “On” instead of “for every”.
Exploding Arrow
If a ![]() is rolled, the is lost at the beginning of the Defensive Roll Phase. However, your opponent can play cards (e.g. “Not This Time”) before the is lost.
is rolled, the is lost at the beginning of the Defensive Roll Phase. However, your opponent can play cards (e.g. “Not This Time”) before the is lost.
Ninja
The Ninja knows that victory is never truly certain, so she has spent countless hours to hone her craft. As a master of ninjutsu, she deals massive amounts of damage using unconventional methods. When she’s prepared, she can even dodge incoming attacks with more consistency than any other hero.
Weapon of choice: Ninjatō
Tokens
Rule Clarifications
Ninjutsu
Ninjutsu can be spent any time after an Attack activates (including before or after the defense roll), but must be spent before damage is dealt.
If you are about to gain more Ninjutsu beyond the stack limit, you can spend some to make room for the incoming Ninjutsu (since spending status effects is an instant action).
If Ninjutsu is spent after your opponent has rolled their Defensive Ability, you can no longer make the Attack undefendable.
Spending Smoke Bomb
Smoke Bomb may not be used against an Ultimate Attack since Ultimate damage cannot be prevented in any way.
Cards may be played to change the Smoke Bomb die roll as long as the card is allowed to be played during the phase you’re in.
A single Smoke Bomb token avoids all cumulative damage taken during the Phase.
If the first Smoke Bomb fails, you may spend an additional token in the same turn.
If your Smoke Bomb succeeds against normal Attack damage, you can still activate your Defensive Ability.
Gaining Smoke Bomb
If you already have a Smoke Bomb and would gain a second, you can spend the first one to make room for the second Smoke Bomb (since spending status effects is an instant action).
Delayed Poison
If your opponent is inflicted with 2 Delayed Poison tokens, they would receive damage at the conclusion of their turn (since damage is always accumulated and resolved at the conclusion of the phase in which it was dealt).
Walk the Line
Cards can be used to manipulate the two dice when calculating the damage of the ability. However, once the value is locked in, you cannot go back to change the outcome.
Paladin
The Paladin’s sword of righteousness strikes hard and true. Through faithful devotion, he is capable of celestial defense. The Paladin wades into battle assured that the Divine is with him and that victory is his sovereign right.
Weapon of choice: Sword
Tokens
Rule Clarifications
Protect
If two Protect tokens are spent against the same Attack, both are calculated independently of each other. This cuts the damage in half twice, resulting in no damage received (because all damage is calculated simultaneously at the conclusion of the roll phase).
If gained from your Defensive Ability, it may be spent immediately.
Retribution
Retribution deals half of incoming damage back to your opponent after calculating any additions/preventions to the damage. If spent with Protect on the same Attack, both values are calculated independently of each other (after all other additions/preventions that are not halving damage are resolved).
Crit
Crit may only be spent if the Offensive Ability activated deals 5 or more dmg before Attack Modifiers.
Can be spent any time after an Attack activates (including before or after the defense roll), but must be spent before damage is dealt.
The Crit gained from activating the Righteous Prayer ability cannot be used on the damage being dealt (due to the word “then”).
Tithe II
Gaining activates if you use a ![]() for your small/large straight ability (e.g. 3, 4, 5, 6), but not if you roll a
for your small/large straight ability (e.g. 3, 4, 5, 6), but not if you roll a ![]() for your added effects of your other abilities (e.g. Righteous Combat).
for your added effects of your other abilities (e.g. Righteous Combat).
Blessing of Divinity
Blessing of Divinity does not reduce or prevent any damage from an opponent’s Ultimate. If the Ultimate would reduce your Health to , your Health is instead set to .
If Blessing of Divinity is triggered while you are afflicted with Poison , you would survive the damage. However, during your next Upkeep Phase, you would receive dmg from Poison and your Health would then be reduced to .
Pyromancer

The Pyromancer has only one way to deal with her enemies: swift, hot destruction. Even her defense is offensive. She is a glass cannon who deals massive amounts of damage, turning her foes to ash.
Weapon of choice: Fire and explosions
Tokens
Rule Clarifications
Stun
While you are stunned, you cannot take any actions of any kind. Even if your opponent has an ability, status effect, or card that could prevent an incoming status effect, Stun is inflicted before any damage is dealt. However, a teammate who is not stunned could perform actions to remove Stun .
Once you remove the Stun token and start a new Offensive Roll Phase, your opponent is no longer stunned and may act normally
Collateral dmg
When dealing collateral damage to all opponents in a 2v2 game, each individual opponent receives the damage separately (even though they share the same health pool). The other team would therefore receive a total of damage (in addition to any other damage from the ability).
Burning Soul II
If you roll ![]()
![]()
![]()
![]() , both effects are activated since you have satisfied both conditions (inflict Burn and increase your max Fire Mastery stack limit).
, both effects are activated since you have satisfied both conditions (inflict Burn and increase your max Fire Mastery stack limit).
Fire Mastery
When the Fire Mastery stack limit is increased, it lasts for the remainder of that game.
Samurai
Driven by an endless pursuit of honor, the Samurai will stop at nothing to drive all who are not worthy from his sight. He marks with shame those who are small, petty, and insignificant. In the end, the shameful must be put to the sword, even if this means taking his own life.
Weapon of choice: Katana
Tokens
Rule Clarifications
Shame
Shame — Attack Modifier — reduces damage from normal and undefendable attacks. Does not reduce damage from collateral, pure, or ultimate attacks.
Removing Shame
Your opponent must deal normal or undefendable damage as a result of an Attack to remove a Shame token. All Shame is removed if your opponent inflicts 1 or more damage. It does not reduce damage from an Ultimate. However, after the Ultimate completes, the opponent removes their Shame tokens.
Back Strike
Back Strike cannot be spent in response to an Ultimate.
Honor
You still gain Honor from your Bushido Passive Ability even if you performed fewer than 3 Roll Attempts due to a Negative status effect (Entangle , Constrict , etc) or if your opponent forces you to re-roll one or more of your dice.
If you perform only one Roll Attempt, you still only gain one Honor .
If you have two Honor and then would gain more, you can spend the Honor you already have and then gain the additional Honor since status effects may be spent as an Instant Action.
Santa
Don’t let his festive cheer, jolly smile, and mugs full of egg nog lull you into a false sense of security. For those on the naughty list, you better watch out. You better not pout. Santa Claus is coming to pound!
Weapon of choice: Holiday Cheer
Tokens
Rule Clarifications
Egg Nog
Egg Nog can be used the same turn it is gained.
If you are about to gain more Egg Nog beyond the stack limit, you can spend some to make room for the incoming Egg Nog , as spending status effects is an instant action.
When you gain Egg Nog , you gain it all at once and must be able to make room for all of it immediately or you will lose the excess (for example, if you were gaining 5, you cannot gain 2, spend 3, and then gain 3 more).
When an opponent tries to remove or steal Egg Nog , you can spend it before it’s gone by following priority rules.
Damage from Egg Nog
Isolated damage is dealt immediately and counts as a separate instance of damage regardless of any other damage that is dealt within the same phase.
Cheer
If an opponent gains Cheer , it is considered their own Cheer and they may use it to re-roll one of their own dice. Also, if they gain three Cheer , they may change their own die to a 6.
When an ability or card reads “Deal dmg per Cheer ”, this additional dmg is per Cheer only on Santa’s own Hero Board.
If an ability reads “opponent gains Cheer ”, this is not optional.
Ultimate Ability
If your opponent is defeated, the additional Roll Phase is forfeit.
Festivities
Santa does count as a “player” when activating his Festivities ability.
Seraph
To look into the face of the Seraph is to gaze upon the hand of God. Her blades are infused with holy energy designed to cut evil from the earth. Her crystal wings carry her above the battlefield where her brilliant light blinds all who do not avert their gaze. Humble yourself before her holy presence or die.
Weapon of choice: Angelic blades
Tokens
Rule Clarifications
Flight
One Flight can be used to avoid all incoming damage types received during the Defensive Roll Phase except Ultimates.
You can use as many tokens as you have available.
Cards can be used to change the Flight die roll as long as the card can be played during the phase you’re in. You can spend Flight immediately after gaining it in an attempt to make your Attack undefendable or to avoid all incoming damage.
Blinding Light
On a roll of 1 for Blinding Light , it prevents all effects of an Offensive Roll Phase. If a 2 or 3 is rolled, the final damage is halved (see Final Damage Total).
It cannot stop an Ultimate Ability. However, after the Ultimate completes, Blinding Light is still removed.
Blessing of Divinity
Blessing of Divinity does not reduce or prevent any damage from the Ultimate. If the Ultimate would reduce your Health to , your Health is instead set to .
If Blessing of Divinity is triggered while you are afflicted with Poison you would survive the damage, but during your next Upkeep Phase, you would receive dmg from Poison and your Health would be reduced to .
Holy Presence
Holy Presence deals damage to all opponents. In a 2v2 match, teams share Health meaning they would take a total of dmg from their shared Health pool.
Purify
When activating Purify an opponent may spend a status effect in response before it is removed. See Priority Rules.
Shadow Thief
The Shadow Thief doesn’t like to end things quickly. He prefers running the long con. Increasing his health, poisoning his foes, hiding & striking from the shadows — that’s his style. If allowed to reach the conclusion of his complicated game plan, his victims will find themselves in utter ruin.
Weapon of choice: Poisoned Dagger
Tokens
Rule Clarifications
Discarding Shadows
If you are already in the Shadows and then gain it again, a second instance of it cannot be gained since the stack limit is 1. The first one still goes away at the end of your turn.
Shadows can be transferred to a different player.
It is only discarded at the conclusion of a turn in which you started with the same Shadows token on your Hero board.
Damage while in Shadows
If you are stunned while already in the Shadows , you receive no damage, but your opponent would still gain an additional Offensive Roll Phase.
Damage received outside of an opponent’s Offensive Roll Phase is not prevented (i.e. Poison , Burn , etc).
Does not prevent damage from an Ultimate Ability.
Defensive Ability
You must choose which Defensive Ability to use before you roll your dice.
If you roll ![]()
![]() on your Shadow Defense, you gain both a Sneak Attack and Shadows .
on your Shadow Defense, you gain both a Sneak Attack and Shadows .
Dealing as dmg
Sneak Attack
Sneak Attack can be spent any time after an Attack activates (including before or after the defense roll), but must be spent before damage is dealt.
Tactician
The Tactician surveys the battlefield with assurance and calm, confident that there is no foe greater than he. From atop the higher ground, he claims victory by asserting absolute control over all that he sees.
Weapon of choice: Saber
Tokens
Rule Clarifications
Tactical Advantage
There is no limit to how many different effects can be used in one turn.
Tactical Advantage can be used the same turn it is gained.
If you are about to gain more Tactical Advantage beyond the stack limit, you can spend some to make room for the incoming Tactical Advantage , as spending status effects is an instant action.
When you gain Tactical Advantage , you gain it all at once and must be able to make room for all of it immediately or you will lose the excess (for example, if you were gaining 4, you cannot gain 2, spend 3, and then gain 2 more).
When the Tactical Advantage stack limit is increased, it lasts for the remainder of that game.
When an opponent tries to remove or steal Tactical Advantage , you can spend it before it’s gone by following priority rules in the rulebook.
Targeted
Targeted increases damage from an Attack, and does not increase pure or collateral damage. All damage is calculated simultaneously at the conclusion of the Roll Phase.
Protect
If gained during your Defense, Protect may be used immediately.
If 2 Protect are spent against the same Attack, both are calculated independently of each other, cutting the damage in half twice and taking no damage, because all damage happens simultaneously.
Profiteer
If you have Blind or Blinding Light and activate Profiteer and roll a 6, you must still roll for Blind /Blinding Light because these status effects must be checked at the conclusion of the Offensive Roll Phase.
Treant
The Treant is the most elder of contenders. He decided he could no longer be a stick in the mud weeping over willows. He chose to branch out, leafing his thicket behind with a sappy goodbye. He dug deep, packed his trunk, spruced himself up, and began lumbering ever closer to the true root of the problem–the Mad King.
Weapon of choice: Branches
Spirits
You may spend 1 Spirit of each type once per turn to receive one of the effects. To ‘Grow a Spirit‘ means to gain a Seedling or upgrade an existing Spirit (from Seedling to Sapling or from Sapling to Dryad ).
Tokens
Rule Clarifications
Spirits
They do not count as status effects (they are Companions). Spending a Spirit counts as an instant action.
Each Spirit type can only be spent once during each player’s turn (except during an opponent’s Ultimate).
If an ability causes you to “discard” or “remove” a Spirit, you do not also get to use its normal “spend” effect.
Dryad
Dryad can be spent to stop the Treant from becoming inflicted with Stun . A Dryad prevents an incoming status effect at the conclusion of the Offensive Roll Phase; therefore, the Stun has not yet been inflicted.
Nature’s Grasp
If you spend a Spirit during your Attack, the damage is not lowered (since damage is dealt based upon the number of spirits you have when the ability was activated).
Rooted
If you grow a Seedling , you cannot use it to re-roll a Defensive Ability die.
If you grow a Dryad , you cannot spend it to prevent an incoming status effect.
If you grow a Sapling , you can spend it as long as you haven’t spent one earlier in the turn.
Barbed Vine
Damage is only received if you are still afflicted with Barbed Vine at the conclusion of the Roll Phase.
If your opponent has Health, they may still take up to 3 Roll Attempts since the damage from Barbed Vine is accumulated with all other damage and applied simultaneously at the conclusion of the Roll Phase.
Vampire Lord
The Vampire Lord’s power paralyzes even the bravest fighters. No combatant is more vicious. Her rending claws will leave her foes bloody and hemorrhaging. Attempting to resist her mesmerizing gaze or overcome her powerful blood magic will prove deadly for any foolish enough to oppose her!
Weapon of choice: Blood Power
Tokens
Rule Clarifications
Gaining Blood Power
If you are about to gain Blood Power beyond the stack limit, you may spend some to make room for the incoming Blood Power (since spending status effects is an Instant Action).
Spending Blood Power
“Once per turn” means during yours or your opponent’s turn.
1 Blood Power effect:
- May be spent any time after an Attack activates and before the damage is dealt (e.g. after the Defense Ability has been activated).
2 Blood Power effect:
- Activating this effect counts as an Instant Action (so your opponent may not spend the chosen status effect before this resolves).
4 Blood Power effect:
You may activate this effect at any time during the Roll Phase, but you do not heal until your Attack’s damage is successfully dealt.
If an opponent heals during their defense, this does not affect the dmg successfully dealt (however, damage prevention would affect it).
You still heal equal to the total damage successfully dealt by your Attack, even if your opponent’s health is less than this amount.
Ultimate
If the card you put into your hand from your Ultimate Ability is a Roll Phase Action or Instant Action card, you may play it immediately.
Steal Health
Since this does not count as ‘dealing damage’, it cannot be prevented or reduced and does not count toward damage calculations. You cannot Steal more Health than your opponent has available.
Portal Crawl Turns
During the Portal Crawl, you will engage in battle with various Minions. The first 3 steps of your turn, Move & Explore, are only performed if you are not engaged with a Minion at the beginning of your turn. If you are engaged with a Minion at the beginning of your turn, skip the Move & Explore steps, and immediately proceed to the Minion Battle (steps 4–7).
Move & Explore (only if not engaged)
- Spend Salve : Refer to the Scenario Card.
- Move: Move any distance across explored Environments to an unexplored Environment or ongoing Minion Battle.
- Explore: If you moved to an unexplored Environment during the Move step, reveal it and Resolve all its effects. If a Minion icon is shown, setup & engage the new Minion and proceed to Minion Battle.
Minion Battle (only if engaged)
- Spend Salve : Same as above.
- First Strike : If applicable, complete Minion Step before Hero Step (below).
- Hero Step: Perform a complete Dice Throne turn.
- Minion Step: The Minion performs a complete Dice Throne turn (with a few exceptions).
Boss Battle Turns
During a Boss Battle, players will take turns in clockwise order until the Boss or your team is defeated. On your turn…
- Spend Salves (optional): If desired, spend to Heal on the shared Health dial (may spend multiple).
- Hero Step: Perform a complete Dice Throne turn.
- Boss Step: The Boss performs a complete Dice Throne turn (with a few exceptions).
Dice Throne Adventures Setup
When beginning a new campaign, choose a Difficulty Level card (we recommend “Normal” if you are new to Dice Throne) and fill in the following on the Campaign Scoring sheet:
Difficulty Level
Your Team Name
Your Names
Your Chosen Heroes: You will continue with the same Hero for the whole campaign.
Scenario Score: Indicated on chosen Difficulty Level card.
Game Area Setup
When starting or continuing a campaign, place the following components on the table within reach:
Token Tray
Loot Table
-
Card Caddy Tray: Make sure the Loot cards are separated into their 4 decks, as indicated by their Loot icons (Common , Rare , Epic , Legendary ), and shuffle each deck.
If playing a Portal Crawl, also make sure each Level of Minion cards is separated into its own deck and shuffled. Keep Minions and Loot cards in the vac tray.
-
Scenario Card: 4 Scenario cards exist for each Portal Crawl scenario. Randomly choose one to determine your Portal Crawl map. If you are setting up for a Boss Battle scenario, simply take the associated Scenario card.
Player Setup
Set Health Dial: See Scenario card to determine starting Health value as part of Hero setup.
Take 1 Loot Die
Take 1 Turn Order Card
Set up your Hero’s remaining components: As per a normal Dice Throne match, gain and draw .
-
Distribute starting salves: For session one, distribute the Starting Salves indicated on the Scenario card.
For all other sessions, reference the Starting Salves indicated on the Campaign Scoring sheet. You may distribute Salve
tokens amongst your team in any fashion.

Next, set up the scenario depending on type — Portal Crawl, or Boss Battle.
Components
- 70 Environment tiles: 22 level I/II/III and 4 level IV Environments
- 1 Gold dial
- 2 Portal Tiles: 1 Crimson Sands and 1 Boss Portal tile
- 20 Scenario cards: 4 level 1,3,5 and 7 and 1 per Boss
- 4 Enemy dials: Health tracked on one side, Combat Points tracked on the other
- 160 Boss cards: 40 cards per deck
- 1 Campaign Scoring sheet
- 4 Legacy packs
- 2 Difficulty cards
- 10 Chaos dice
- 4 Loot dice
- 4 Boss leaflets: 1 for each Boss
- 4 Boss boards: 1 for each Boss
- 1 Loot table: Regular Loot on one side, Boss Loot on the other
- 52 Minion cards: 17 level I, 17 level II, 13 level III, and 5 level IV
- 16 Hero Standees and 16 Standee Bases: Barbarian, Treant, Samurai, Gunslinger. Not pictured here: Artificer, Cursed Pirate, Huntress, Monk, Moon Elf, Ninja, Paladin, Pyromancer, Seraph, Shadow Thief, Tactician, and Vampire Lord. If you’d like to play with highly detailed, premium miniatures visit dicethrone.com!
- 140 Loot cards: 41 Common, 38 Rare, 31 Epic, and 30 Legendary
- 1 Shopkeeper leaflet
- 4 Turn Order cards
- 1 Token Tray - After punching out the tokens, load them into the tray according to the above diagram
- 1 Card Caddy Tray: For instructions on how to load this tray, see “The Card Caddy”
- 1 Leaflets & Boss Boards Tray: This tray comes preloaded with all the leaflets and boss boards
- 1 Dials, Dice, & Figures Tray Place standees and miniatures into this tray before playing your first game
Status Effects and Tokens
- 4 Back Strike
- 4 Barbed Vine
- 8 Bleed
- 4 Blind
- 4 Bounty
- 4 Burn
- 8 Chaos
- 4 Concussion
- 4 Entangle
- 5 Evasive
- 3 Flight
- 4 Knockdown
- 4 Parasite
- 8 Poison
- 2 Shadows
- 1 Stun
- 6 Wither
- 8 Double-Sided Damage +1/+2
- 8 Double-Sided Damage +3/+4
- 11 King’s Hand
- 10 Salve
- 2 Life Siphon
- 4 Dominance
- 4 Hex
- 4 Silence
- 4 Double-Sided 1/2 Loot Chests
- 4 Double-Sided 3/4 Loot Chests
- 5 Double-Sided 0/1 CP tokens
- 3 Double-Sided 3/5 CP tokens
- 3 Portal Shards
- 2 First Strike Markers
Achievements!
When someone in your gaming group performs one of these feats, have them initial the box to be remembered forever in your Great Charter!
Download at: achievements.dicethrone.com
Boss Battle
For each Boss Battle scenario, you will be working together to fight a Boss. You and your team will take turns operating the Boss the same way you did for the Minions. Some preparation is necessary.
Refer to the Boss Battle scenario card:
Boss Battle Setup
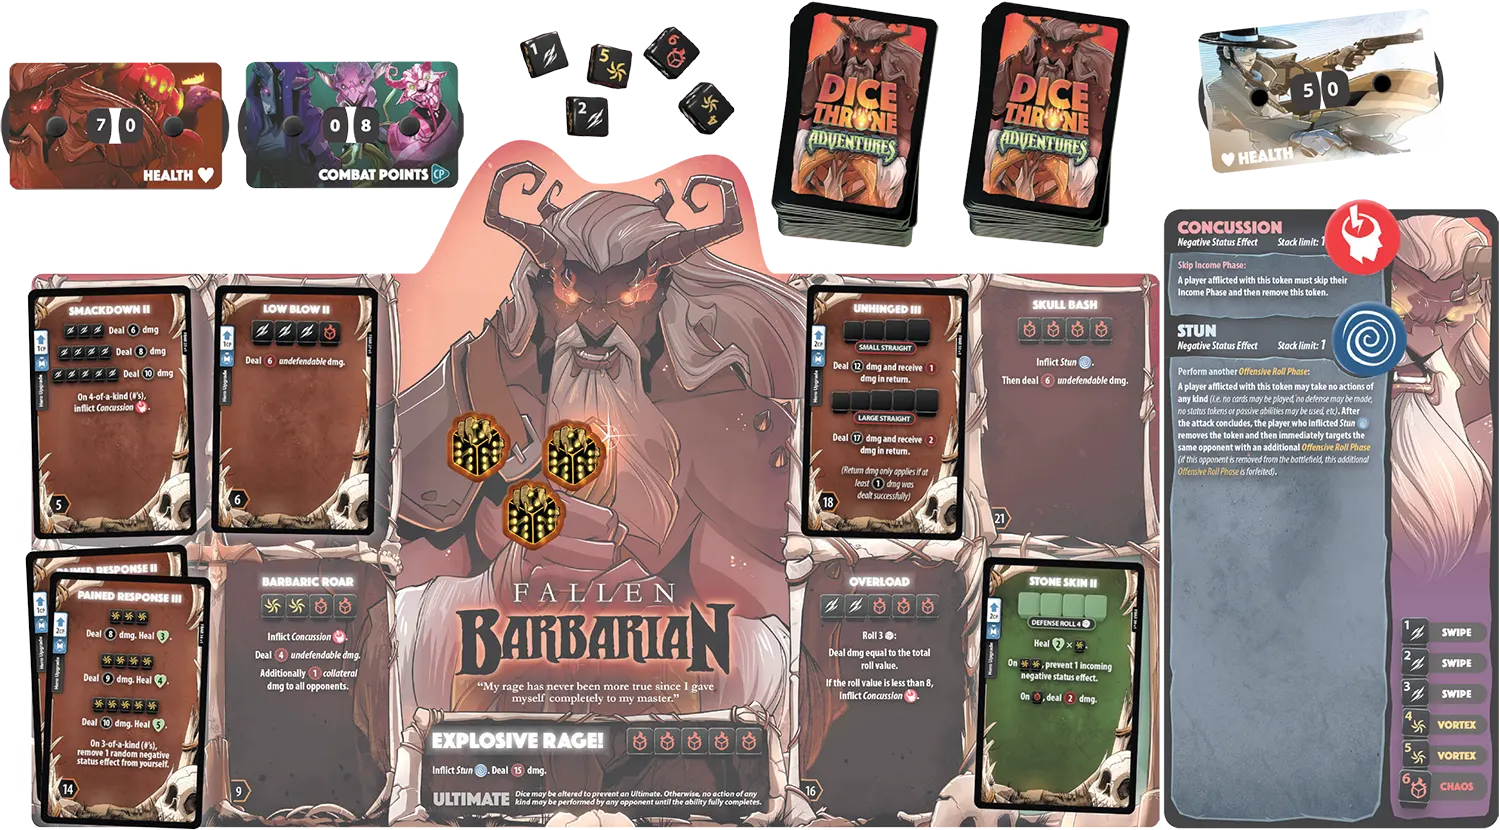
-
Choose 1 Health dial for your team and set it to the amount indicated on the Boss Battle scenario card. When you face a Boss, your team shares a common pool of Health.
-
In the center of the table, place the following (as you would arrange them for a normal Dice Throne player):
- Boss’ board , leaflet , Status Effect tokens , and card deck
- Enemy dial - Health side up
- Enemy dial - side up
- 5 Chaos dice
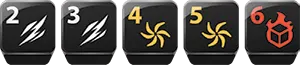
- King’s Hand tokens of the quantity indicated on the Boss Battle scenario card
-
Separate the Boss’ cards into two decks and shuffle each deck:
-
Action deck - Action cards used by the Boss during the battle. All Action cards can be identified by an action star () on the left side of the card.
-
Upgrade deck - Upgrade cards used only for Boss Setup. Upgrade cards can be identified by the upgrade arrow () on the left side of the card.
-
Set the Boss CP dial to the “Upgrade CP” value indicated on the Boss Battle scenario card.
-
One by one, turn over the top card from the Boss’ Upgrade deck and place them on the matching Ability of the Boss’ board. For each card:

- The Boss spends Upgrade CP according to the card’s cost.
- When upgrading from a level 2 card to a level 3 card, only spend the difference in cost.
- If it is a level 2 Upgrade card and the Boss already has the level 3 Upgrade card, discard it and draw another (no Upgrade CP is gained from discarding).
- If the Boss could place the Upgrade card, but cannot afford the cost, discard it and stop drawing cards.
Boss board Setup is now complete.
Upgrade cards remaining in the Upgrade deck or discarded can be set aside or returned to the box.
Set the Enemy dial ( side up) to the indicated Starting CP value shown on the Scenario card.
Set the Enemy dial (Health side up) to the indicated Health value shown on the Scenario card.
The Boss is now prepared for battle!
End of Battle
Whether you are victorious or are defeated in battle, you will receive some reward and your journey will continue. (see Scenario Conclusion)
Note: In the rare situation that you and the Boss are reduced to Health at the same time, your team is victorious.
Boss Loot
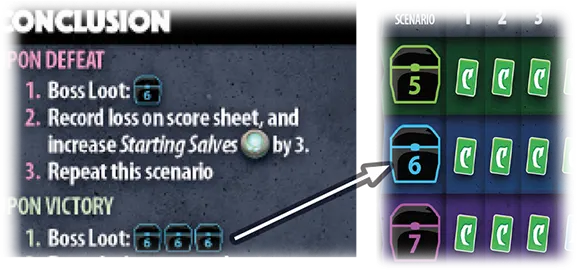
Whether you’ve won or lost a Boss Battle, you will now gain Boss Loot. Turn the Loot board over to the Boss Loot side and perform the following steps a number of times equal to the quantity of chests shown under “Boss Loot” in the Conclusion section of the Boss Battle Scenario card.
-
Each player rolls their Loot die
. -
Examine the Boss Loot table and take the top card from the corresponding Common/Rare/Epic/Legendary Loot deck according to the result of your die roll.
-
Examine the drawn card and choose to either:
-
Immediately add the card to your deck.
-
Discard the card. For each card discarded in this fashion your team will gain 1 Scenario Point, which should be recorded on your Campaign Score sheet (in the “Unclaimed Boss Loot” row).
-
If your reward is a Loot card of a lower level than one already in your deck, place the lower level card on the bottom of its Loot deck and draw a replacement card from the top. Repeat this as many times as necessary.
Boss Step
During step 3 of a Boss Battle turn the teammate before you now performs the Boss’ turn, which is a standard Dice Throne turn with a few exceptions:
-
Upkeep Phase
Resolve applicable status effects.
-
Income Phase
The Active Player gains a Hero Bonus of 1 Salve
.
Increase the Boss dial by . Like Dice Throne Heroes, Bosses can have a maximum of .
Draw a card from the Boss Action deck (flip it over and place it back on their deck).
The Active Player immediately gains the Hero Bonus shown in the top right corner of the card.
-
Main Phase (1)
If the card drawn during the Income Phase was a Main Phase Action card, the Boss plays it by spending CP equal to the cards CP cost. After resolving the card, place it in the discard pile.
If the Boss cannot afford the CP cost of the card or the card would have no effect, the card is sold (discarded), increasing the Boss dial by .
If the drawn card is a Roll Phase Action card, ignore it until the Offensive Roll Phase.
-
Offensive Roll Phase
-
Roll the 5 Chaos dice
:-

Re-roll any dice that do not match the Roll Objective shown on the last drawn card.
Re-roll dice a second time if the Roll Objective has still not been met.
-
-

Activate an Ability: The Boss then Activates the ability with the highest priority number that it has fulfilled the Activation Requirement for, regardless of what the original Roll Objective was.
-
Resolve Roll Phase Action cards: If the Boss had drawn a Roll Phase Action card, they now spend CP equal to the cards CP cost and resolve the card’s effect.
If the card would have no effect, or the Boss cannot afford to play it, it is sold (discarded) at the conclusion of the Defensive Roll Phase for (the card may still be useful if the Boss performs another Offensive Roll Phase due to a successful King’s Hand roll).
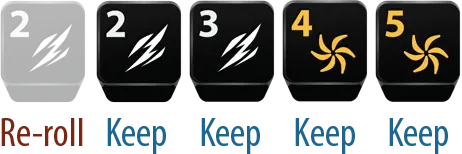
The 2 is rerolled because only one 2 should be kept.
6 is kept because it forms a Small Straight.
1 and 6 are re-rolled because neither one forms a Small or Large Straight.
When the Roll Objective is Straights, adhere to the following rules when choosing which dice to re-roll:
-
Keep exactly one of each 2, 3, 4, and 5 result.
Only keep a 1 or 6 value if it is already part of a Small or Large Straight.
Remember: If the Boss fails to activate an ability on its turn, they will spend one or more King’s Hand
tokens in an attempt to start another Offensive Roll Phase.
-
-
-
Targeting Roll Phase
The Boss targets you (the Hero whose turn it currently is).
-
Defensive Roll Phase
If the Boss’ Attack is defendable, activate your Defensive Ability.
Main Phase (2) - Skip this phase.
Discard Phase - Skip this phase.
Campaigns
A campaign consists of 8 scenarios which alternate between two different game modes:
- Portal Crawls (scenarios 1, 3, 5, and 7)
- Boss Battles (scenarios 2, 4, 6, and 8)
If your team successfully completes a scenario, you will receive rewards, scenario score, and then advance to the next scenario. If your team fails to complete a scenario, you will be required to repeat it until you finally achieve victory (unless otherwise specified by your Difficulty card).
Once you defeat the Mad King, your team has successfully completed the campaign!
Campaign Score
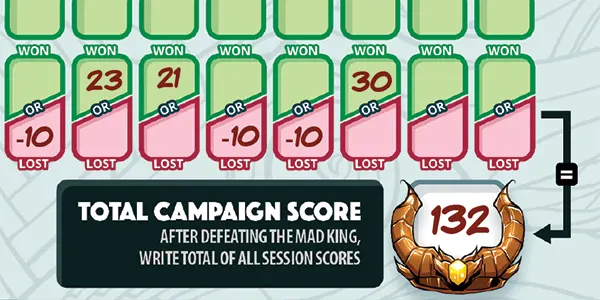
After defeating the Mad King and recording your final session score, total your campaign score by adding up all the “won” and “lost” session scores. This is a great tool when comparing different campaigns of Dice Throne Adventures.
Go to myscore.dicethrone.com to share your score see how others have fared in their conquest for the Throne!
You can download and print more copies of the score sheet from scoresheet.dicethrone.com.
Card Caddy
Loading the Card Caddy
Dice Throne Adventures includes a functional Card Caddy. Before playing your first game, you must first load all the game’s cards and Environment tiles into it. Behind each deck of cards, place the associated divider. Make sure all content is faced with the card backs toward you and the Minion cards closest to you.
Watch a video demonstration of how to load the Card Caddy.

Level I Minion deck and divider.
Level II Minion deck and divider.
Level III Minion deck and divider.
Level IV Minion deck and divider.
Scenario cards and divider. Behind the Scenario card divider, place Legacy pack A (do not open).
Fallen Barbarian Boss deck and divider.
Fallen Gunslinger Boss deck and divider.
Fallen Monk Boss deck and divider.
Mad King Boss deck and divider.
Legacy packs C & D (do not open). Behind the Legacy packs place an “Other cards” divider. This area is also handy for storing your Hero’s extra unused card sleeves.
Common Loot cards and divider.
Rare Loot cards and divider.
Epic Loot cards and divider.
Legendary Loot cards and divider.
Turn Order Player aids and Difficulty cards. Behind these cards place an “Other cards” divider.
Legacy pack B (do not open).
Place each stack of Environment tiles. Each Level of Environments should be together. Also place the Crimson Sands and Boss Portal Tile here.
Assigning a Banker
We recommend that before starting the game, assign the duty of “Banker” to one player at the table. The Banker should give cards directly from the Card Caddy to players when necessary.
Explore
Exploring new Environments promises many rewards for adventurers, but also grave danger… and unless a fellow Hero arrives to help later on, you will face these alone.
After moving to an unexplored Environment, collect any items present on the face-down tile:
- Place collected Portal Shards
 on the Boss Portal
  .
. - Place collected Salves on your Hero board.
- Open Loot Chests , with all players rolling their Loot die to receive a reward.
Next, you must flip over the Environment tile. The tile may show multiple features, which (if present) are dealt with in the following order:
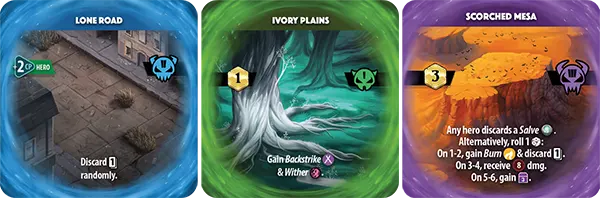
- Increase your dial by the indicated amount.
- Increase the Gold dial by the indicated amount.
- Deal with mandatory actions or optional choices. Unless otherwise specified, these only apply to you.
- Draw and reveal a new level I/II/III/IV Minion card from its deck, perform the Minion setup steps, and then engage it in battle!
Note: Instant Action cards or spendable status effects may still be used to alter any dice rolls. You cannot use Main Phase or Roll Phase cards outside of battles.
First Strike
Any Minion with First Strike will always Attack the Hero first in a Portal Crawl turn. So, if the minion you're engaged with has First Strike , perform the Minion Step before (instead of after) the Hero Step.
Note: If a Minion with First Strike is defeated during its turn, you still get your full turn afterwards. Even though there is no longer an enemy, you might still activate an ability which provides other benefits.
Other DTA Game Modes
Boss vs Many Mode
Boss vs Many is a 3–5 player alternate game mode that allows you to play a Boss Battle with one player playing as the Boss! All standard Dice Throne rules apply, with the following exceptions:
Heroes Setup Changes
Boss Setup Changes
- Boss starts with Health + Health per Hero.
- You shuffle together both the Boss’ Upgrade deck and the Action deck.
- Boss starts with cards & .
Start Player
- Boss is always the Start Player.
- Boss does not skip his Income Phase.
Turn Order
All players, including the Boss player, take turns in clockwise order performing a standard Dice Throne turn.
King’s Hand
King’s Hand tokens are a Unique Status Effect (Stack Limit: 5): Cannot be removed or transferred by any means.
- Boss gains a King’s Hand during every player’s Upkeep Phase (his own and every Heroes).
- Boss may spend at any time to gain a King’s Hand token (Stack Limit: 5).
When a King’s Hand token is spent, roll a Loot die :
- On 1–10, gain .
- On 11–15, do one of the following:
- Force your opponent to re-roll one of their dice.
- Gain 1 additional Roll Attempt.
- On 16–20, change the value of any one die.
Targeting Phase
The Heroes always target the Boss.
The Boss, however, must roll for the Targeting Phase. Who they Attack is determined by rolling 1 Chaos die  .
.
2 Heroes vs Boss
- 1–3, Hero on Boss’ Left
- 4–6, Hero on Boss’ Right
3 Heroes vs Boss
- 1–2, Hero on Boss’ Left
- 3–4, Hero in the Center
- 5–6, Hero on Boss’ Right
4 Heroes vs Boss
- 1–4, 1 being Hero on Boss’ left and continuing clockwise
- 5–6, roll again
Boss vs Boss Mode
Boss vs Boss is a 2-player alternate game mode that allows you and an opponent to square off in a normal 1vs1 Dice Throne duel! All standard Dice Throne rules apply, with the following exceptions:
Setup Changes
- Start with Health.
- You shuffle together both the Boss’ Upgrade deck and the Action deck.
- Draw and gain .
King’s Hand
King’s Hand tokens are a Unique Status Effect (Stack Limit: 5): Cannot be removed or transferred by any means.
- Gain a King’s Hand token during every Upkeep Phase.
- Either Boss may spend at anytime to gain 1 King’s Hand token (Stack Limit: 5).
When a King’s Hand token is spent, roll a Loot die :
- On 1–10, gain .
- On 11–15, do one of the following:
- Force your opponent to re-roll one of their dice.
- Gain 1 additional Roll Attempt.
- On 16–20, change the value of any one die.
Hero Step
Perform a complete Dice Throne turn (see your Hero’s Turn Order card).
Upkeep Phase: Resolve applicable status effects
Income Phase: Gain and draw
Main Phase (1)
- Play ability upgrades
- Play Main Phase Action cards
- Sell cards (gain per card)
Offensive Roll Phase: Perform up to 3 Roll Attempts to activate an ability
Targeting Roll Phase: Your target is the Boss or the Minion that you are currently engaged with
Defensive Roll Phase: The Boss or Minion performs their Defensive Ability
Main Phase (2): Identical to Main Phase (1)
Discard Phase: Sell cards until you have or fewer cards in your hand
The King’s Hand
King’s Hand tokens are Unique Status Effects that cannot be removed or transferred.
They are used as potentially battle-saving comebacks by Bosses and powerful Minions displaying a King’s Hand symbol. Spending King’s Hand tokens is not optional.
Some powerful Minions start with 1 King’s Hand token, specified on their card (see step in “Minion Setup”).
Because scenarios scale in difficulty, so do the details surrounding King’s Hand tokens:
Starting tokens: The number of King’s Hand tokens the Boss/Minion begins with.
Max tokens spent per turn: How many King’s Hand tokens the Boss/Minion can spend in a single turn.
Successful roll values: Whenever a King’s Hand is spent, a single Chaos die is rolled. If its value is within the specified range, the King’s Hand activates successfully.
Note: The result of a King’s Hand die roll may be manipulated by applicable cards/tokens.
King’s Hand tokens are automatically spent by the Boss/Minion during two situations:
A. No Ability Activated
If the Boss/Minion fails to Activate an Ability during their Offensive Roll Phase (for any reason):
- Remove any non-persistent Negative Status Effects that would normally be removed at the end of the Roll Phase (e.g. Barbed Vine , Entangle )
- Roll 1 Chaos die .
- A successful King’s Hand roll gives the Boss/Minion another Offensive Roll Phase. See Scenario card to determine successful roll value for your current scenario.
B. When Targeted With An Ultimate
If you activate an Ultimate Ability against the Boss/Minion:
- Roll 1 Chaos die .
- A successful King’s Hand roll forces you to re-roll 1 of your dice.
Legacy Content
When you beat the game for the first time you will unlock Legacy Content! This is as much as we are willing to say on the subject, as you will discover it on your own, and it will guide you in how to use it when it is revealed.
Loot Cards
In Dice Throne Adventures, you are able to upgrade your Hero with powerful Loot cards. These cards:
Feature icons at the bottom based on rarity: Common , Rare , Epic , and Legendary .
Feature a crystal border at the bottom of the card colorized to match its rarity.
May be discarded from your hand at any time to draw a replacement card from your deck.
Equipment Cards
Some Loot cards are classified as Equipment (indicated in the center of the card). When playing an Equipment card:
Pay its required CP and place it face-up next to your Hero board.
All effects of the card are active at all times and the card remains in play for the duration of the scenario.
If you wish to play an Equipment card, but already have 2 in play, you must first discard one (no CP is gained).
Upgrading loot Cards
Many Loot cards you find will be a higher level version of a card you might already have in your deck.
Important: You cannot have two Hero Action or Equipment cards of the same name in your deck. For Example: you cannot have both “So Wild!” and “So Wild III!” in your deck.
Any time you would like to add a Loot card of a higher level than one already in your deck, you must remove the lower level card from your deck. If the lower level card is a:
- Loot card, place it at the bottom of its Loot deck.
- Non-Loot card (cards that do not have a crystal border), return it to your Dice Throne Hero’s tray, keeping it separated from your Hero’s deck. It will not be used in any future session during this campaign. Loot cards featuring a Swap icon indicate it replaces a non-Loot card. If you are using card sleeves, we recommend placing the Loot card in front of the non-Loot card within the sleeve.
The “So Wild III” features a symbol. When you draw this card from the Rare Loot deck, you know you must find and replace the common “So Wild” card already in your deck.
Deck Size Limit
You can have a maximum of 50 cards in your deck. If you go above this amount you must remove a Loot card from your deck before the start of the next scenario, returning the card to the bottom of the appropriate Loot deck.
Custom card sleeves from dicethrone.com come in packs of 50, which helps you keep track of how many cards are in your deck.
If you do not use sleeves, you may need to count your cards as you advance to higher scenario levels to stay at/under the 50 card limit.
Loot Chests
You will find Loot Chests while exploring Environments and from defeating Minions. They contain many possible rewards but what you receive comes down to fate.
To discover your reward, Heroes gaining Loot should roll their Loot die and compare the result with the relevant row of the Loot Table ( ).
Loot table
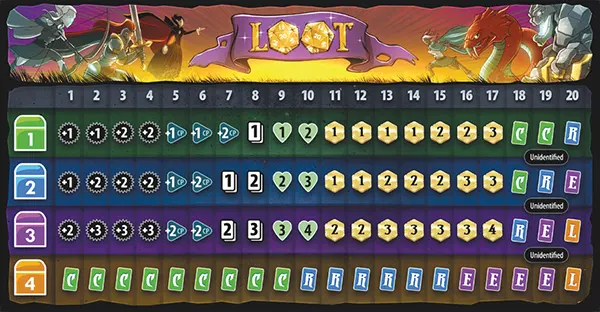
Gain Bonus Damage Token: Take 1 corresponding Bonus Damage token.
Gain CP : Increase your CP dial by the indicated amount.
Draw Cards : Draw the indicated number of cards from your deck. If this causes you to have more than 6 cards, do not discard any until your Discard Phase.
Gain Health : Increase your Health dial by the indicated amount.
Gain Gold ![]() : Increase the Gold dial by the indicated amount.
: Increase the Gold dial by the indicated amount.
Gain Unidentified Loot Card : Take the top card from the Common/Rare/Epic/Legendary Loot deck. Without looking at it, tuck it face-down under the corresponding column of your Hero board. This will keep track of the rarity level of the card.
All Hero boards have four columns of abilities. Going from left to right, tuck the Common/Rare/Epic/Legendary cards in each column.
Important: You cannot use cards or abilities to re-roll or change the result (even if the card says ‘any dice’), unless the card specifically mentions the Loot die.
Minion Battle
If you become engaged, or begin your turn already engaged with a Minion, you must battle and defeat the Minion before you may move again.
With a few exceptions, battling Minions is no different from battling regular Dice Throne opponents.
Follow steps 4–7 of a Portal Crawl turn when battling a Minion…
- Spend Salve : Refer to the Scenario Card.
- First Strike (if applicable): Complete Minion Step before Hero Step.
- Hero Step: Perform a complete Dice Throne turn (see your Hero’s Turn Order card).
- Minion Step: The Minion completes a Dice Throne turn (with a few modifications).
End Of Turn
If you and the Minion are still alive, the next player takes their turn.
You remain engaged with the Minion on your next turn, unless another Hero defeats it before the start of your next turn.
If You Defeat The Minion
When this Minion is defeated, the Active Player receives any non-Loot Chest rewards. However, Loot Chests always have something in them for all Heroes (i.e. all Heroes roll a Loot die and receive a reward from the Loot Table based on their roll).
Place the defeated Minion card at the bottom of its deck.
If The Minion Defeats You
- A teammate must immediately spend a Salve to restore you to Health. You cannot revive yourself. Status effects are not removed when you are revived.
- If you cannot be revived, then the whole team loses the Portal Crawl (see “Scenario Conclusion”).
Minion Step
During the Minion’s Offensive and Defensive Roll Phases, the teammate who’s before you in the turn order should roll the Chaos dice for the Minion.
Perform a complete Dice Throne turn with the following exceptions:
Upkeep Phase: Resolve applicable status effects and Passive Abilities.
Income Phase: Skip this phase.
Main Phase (1): Skip this phase.
-
Roll the 5 Chaos dice
and:Re-roll any dice that do not match the Minion’s Roll Objective or which exceed the required quantity of a symbol.
Re-roll dice a second time if the Roll Objective has still not been met.
When the Roll Objective is Straights, adhere to the following rules when choosing which dice to re-roll:
Keep exactly one of each 2, 3, 4, and 5 result.
Only keep a 1 or 6 value if it is already part of a Small or Large Straight.
The Minion performs the best ability that it has fulfilled the Activation Requirement for, including any Passive Abilities.
-
Targeting Roll Phase: The Minion targets you (the Hero whose turn it currently is).
-
Defensive Roll Phase: If the Minion’s Attack is defendable, activate your Defensive Ability. Spend any applicable status effect tokens.
Main Phase (2): Skip this phase.
Discard Phase: Skip this phase.
Minions
When exploring a new Environment, you may become engaged with a Minion .
Before you begin the Minion Battle, you must draw a random Minion card from the appropriate Minion deck and perform the following setup steps:
-
Take 1 Enemy dial and set the Health side to the indicated starting Health.
-
Take 5 Chaos dice
. If the Minion displays a King’s Hand
symbol, the Minion begins the battle with a King’s Hand token. Read the King’s Hand tokens section of the Scenario card before continuing.
Minion Cards
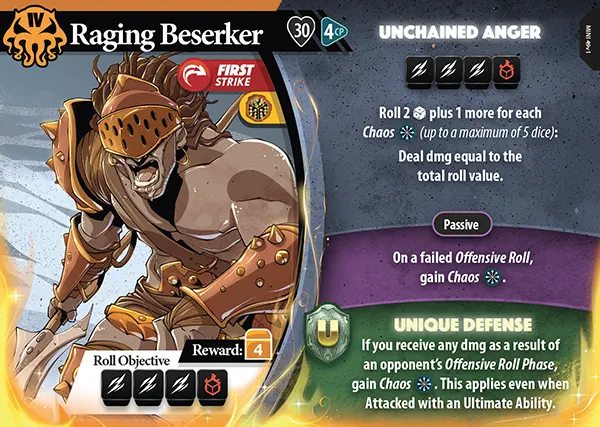
- King’s Hand
Activation Requirement: Just like a standard Dice Throne Hero, all Minions have one or more Offensive Abilities used to Attack you during their Offensive Roll Phase.
Passive Ability: Some Minions have a Passive Ability which should be carried out every Minion turn when possible.
-
Defensive Ability: Defense works the same for Minions as it does for Heroes. When the Minion is Attacked, the player rolling on behalf of the Minion will roll the indicated number of Chaos dice
to determine the Minion’s defense results.
Note: Some Minions have a Unique Defense
 which is activated against all damage types apart from Ultimate Abilities unless stated otherwise.
-
Minion Rewards: When this Minion is defeated, the Active Player receives any non-Loot Chest rewards. However, Loot Chests always have something in them for all Heroes.
Example: when the Raging Berserker is defeated, the team is rewarded a Legendary Loot Chest , which allows each player to roll their Loot die
and receive their reward.
Roll Objective: Roll Objective indicates what the Minion is trying to achieve during their Offensive Roll Phase. As per standard Dice Throne rules, the Minion will have 3 Roll Attempts, using the Chaos dice, setting aside any dice that match their Roll Objective (see “Minion Step”).
Move
When moving, your Hero Standee must travel any distance through a chain of previously explored (face up) Environment tiles until you reach one of the following destinations:
An Unexplored Environment
Travel to an unexplored (face down) Environment tile which you then explore.
An Ongoing Minion Battle
Join a teammate who is currently engaged with a Minion on an explored Environment tile. You also become engaged with this Minion and immediately proceed to the Minion Battle.
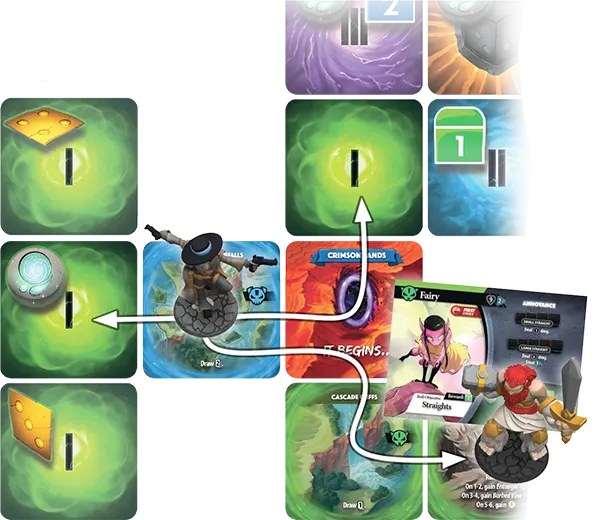
The Gunslinger has the option to move to either of the unexplored level I Environment tiles to discover what is there, or join the Barbarian in his current battle and engage with the Fairy Minion.
You cannot:
- Move between Environment tiles diagonally.
- Travel through unexplored Environment tiles.
- Travel through a teammate who is currently engaged with a Minion.
- Move to a previously explored Environment tile unless you have a teammate on it who is engaged with a Minion.
- Choose not to move. You must move on your turn if you are not already engaged with a Minion.
Minions & Bosses are Players
Minions and Bosses are considered to be “players” and “opponents” and may be affected by any card, status effect, or ability that refers to these.
Cards and abilities that affect multiple opponents may be applied to multiple Minions, regardless of who the Minions are engaged with.
Only you and your teammates are considered to be a Hero.
You may always apply card and ability effects to teammates and Minions, regardless of whether you are in the same Environment or not.
All Boss & Minion cards should be read from the perspective of the Boss or Minion. So when a Boss ability or card refers to an “opponent”, it is referring to a Hero or Boss of the opposing side.
If it is ever unclear what choice a Minion or Boss should make, the Active Player should make the most effective decision for the Minion or Boss.
Portal Crawl

To complete a Portal Crawl, players must explore the Boss Portal tile and defeat the Level IV Minion guarding it. The Boss Portal may not be explored until all 3 Portal Shards have been collected from the map.
To collect Portal Shards, Heroes must explore an Environment with a Portal Shard on it, adding that Portal Shard to the Boss Portal tile.
Along the way you will discover helpful Loot Chests and Salves , but each step is fraught with danger as the Mad King’s Minions lie in wait, ready for battle…
Setup
After finishing the Game Area setup, place the following components on the table within reach:
-
4 Minion Decks
-
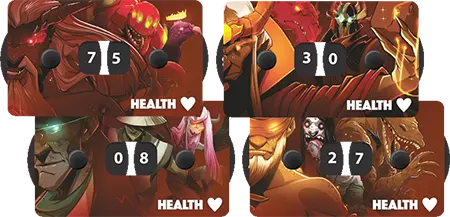
4 Enemy Dials
-
2 sets of 5 Chaos Dice
-

Your Team’s Gold Dial
Now, build the Portal Crawl map following these steps:
Place the Crimson Sands
 starting tile. Then place face-down the Boss Portal , and randomly drawn Environments


 , as indicated on the Scenario card.
Place the 3 Portal Shards
, Loot Chests , and Salve tokens on the indicated tiles.Place your Hero Standees on the Crimson Sands
tile.
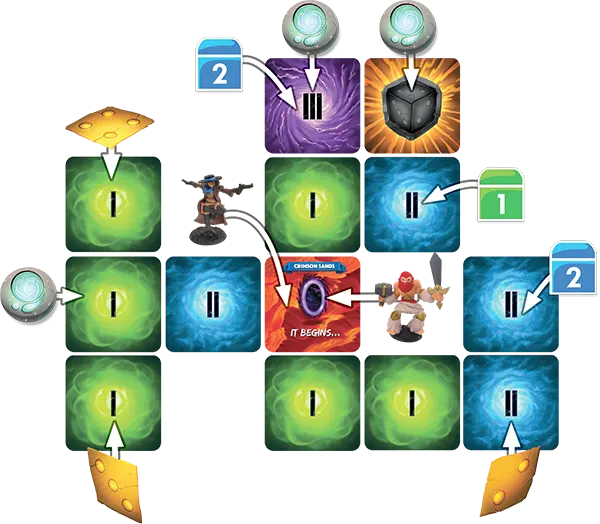
Set your team’s Gold dial to the “Starting Gold” value indicated on the Scenario card.
Start Player
To determine the starting player, all Heroes must roll their Loot die . The player who rolls the highest number goes first.
You are now ready to begin your adventure!
Completing The Portal Crawl
If a Hero’s Health was reduced to 0 and could not be revived by any teammate, your team has lost the scenario.
Once you defeat the Level IV Minion revealed after exploring the Boss Portal tile and all Heroes are not engaged with a Minion, your team has won the scenario.
Proceed to Scenario Conclusion.
Salve
Salve tokens are used to Heal wounds or revive a teammate.
During Portal Crawls
You may choose to spend any number of Salves to Heal yourself. For each Salve spent, Heal the amount indicated at the bottom left of the Scenario card.
Salves may only be used:
- Before you move.
- Before a battle begins, even if the Minion has First Strike .
- Before your Upkeep Phase.
Salves are Unique Status Effects and cannot be removed or transferred. Salves are also spent to revive fallen teammates to Health but may not be used to revive yourself.
During Boss Battles
You may choose to spend Salves to Heal on your team’s shared Health dial (may spend multiple).
Note: Salves may not be spent to revive fallen teammates in a Boss Battle.
Scenario Cards
A campaign alternates between Portal Crawl and Boss Battle scenarios. Scenario cards provide setup and and other details.
Portal Crawl Scenario Cards
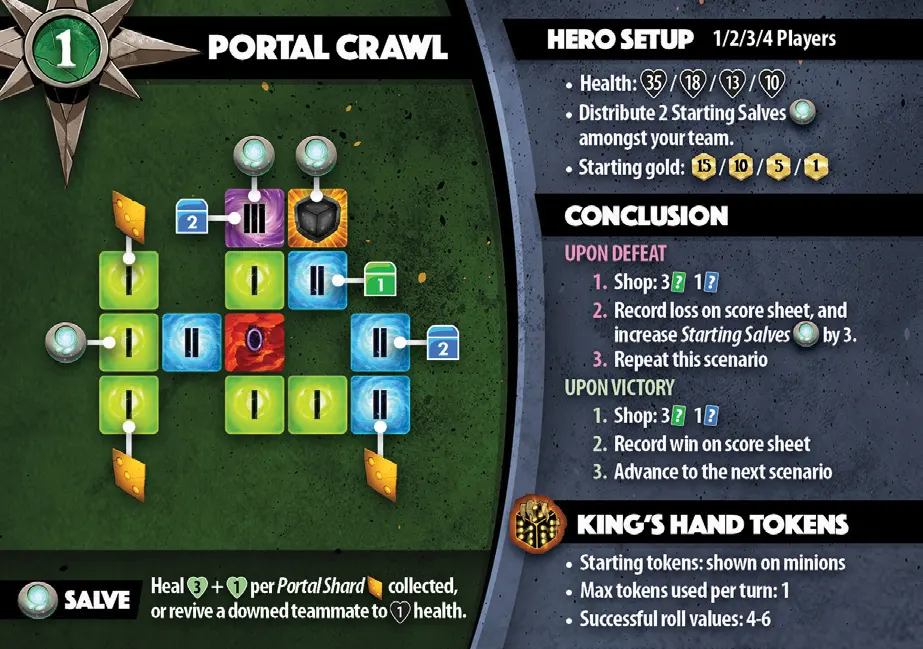
- Scenario Number: Each campaign consists of 8 scenarios. This is an example of the first scenario.
- Game Mode: A scenario is either a Portal Crawl or a Boss Battle.
- Map Layout: Refer to this when you set up a Portal Crawl.
- Salve: The effects of Salve during this scenario.
-
Hero Setup: Details the starting value of players’ Health dial(s) and the team’s Gold dial, depending on whether there are 1/2/3/4 Heroes. If you are just starting out on your adventure, it also indicates the number of Salves
to be distributed amongst your team.
e.g. In a 2-player game each Hero will start with 18 Health and the Gold dial will be set to 10.
Conclusion: Details what to do upon your team’s victory or defeat.
- King’s Hand Tokens: Should be referred back to when you face powerful Minions who use these tokens.
Boss Battle Scenario Cards
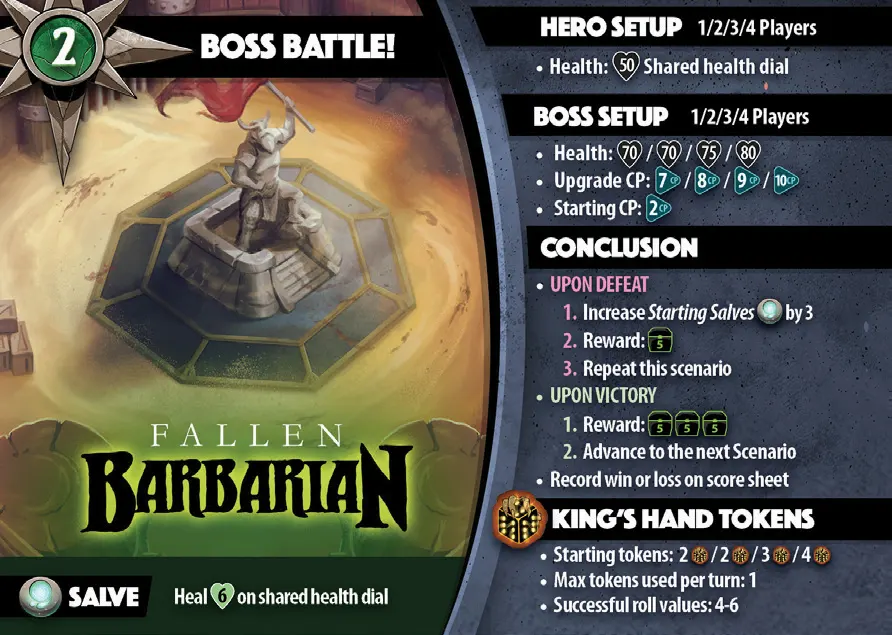
- Scenario Number: Each campaign consists of 8 scenarios. This is an example of the second scenario.
- Game Mode: A scenario is either a Portal Crawl or a Boss Battle.
- Boss: This is the Boss the heroes are battling!
- Salve: The effects of Salve during this scenario.
Hero Setup: Heroes share a Health dial, which starts at 50.
-
Boss Setup: Starting values of Boss's Health, Upgrade CP, and Starting CP during setup, depending on whether there are 1/2/3/4 Heroes.
E.g., in a 2-player game this Boss will start with 70 Health, 8 Upgrade CP, and 2 Starting CP.
Conclusion: Details what to do upon your team’s victory or defeat.
-
King’s Hand Tokens: Refer to this during setup and when the Boss uses these tokens.
Here in a 2-player game, the Fallen Barbarian starts with 2 King’s Hand
tokens.
Scenario Conclusion
After completing a game session of either a Portal Crawl or a Boss Battle, you must perform the 3 conclusion steps below (which are also described on your Scenario card). Before performing conclusion steps, first clean up all of your Hero’s components except for unidentified Loot cards. But keep your deck handy as you will be adding Loot cards to it.
1. Shop / Boss Loot
Permanently upgrade your deck by adding Loot cards. If the current scenario is a Portal Crawl, see “Shop”. Otherwise, see “Boss Loot”.
2. Record Win / Loss & Increase Starting Salves
Record the results of your session on the Campaign Scoring sheet.
Recording A Win
Record win on Score sheet - record the following in the green boxes (when applicable):
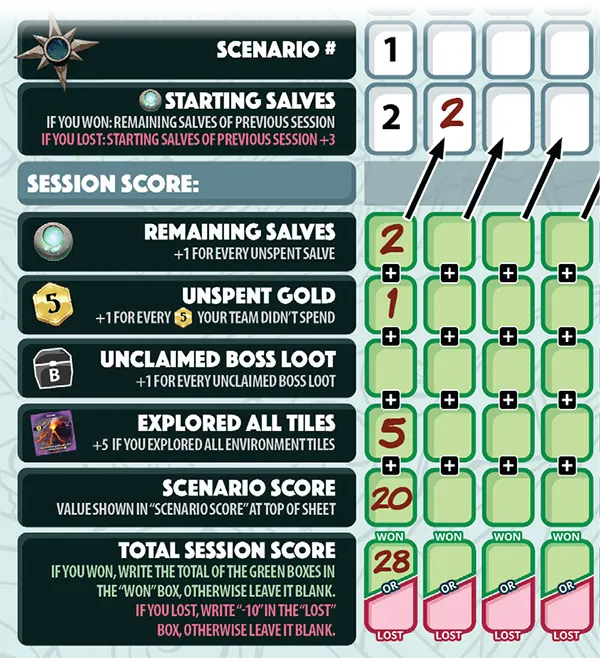
The above example shows scoring for a Portal Crawl and therefore the Unclaimed Boss Loot is left blank.
Scenario #: In the top left corner of the Scenario card.
Remaining Salves: 1 Scenario Point for each remaining Salve
your team didn’t use.Starting Salves for next session: Record the total number of Salves
your team still has in the Starting Salve box for next session.Unspent Gold (Portal Crawl Only): 1 Scenario Point for every 5 unspent Gold your team has remaining after the Shop Phase has concluded.
Unclaimed Boss Loot cards (Boss Battle Only): 1 Scenario Point for each Boss Loot card your team chose not to keep.
Explored All tiles (Portal Crawl Only): 5 Scenario Points if your team explored every tile during a Portal Crawl.
Scenario Score: Points equal to the Scenario Score (in the top right of your Scoring sheet).
Session Score: The total of the above values.
Recording a Loss
When your team is defeated, you will repeat the scenario. When you repeat it, your team will be given 3 more Starting Salves than you began the previous session with.
Record loss on Score sheet - record the following:
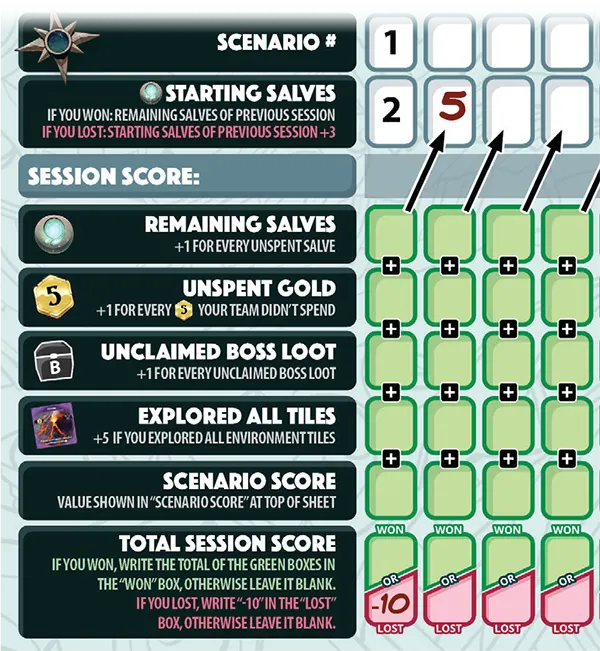
The green boxes in the example above are all left blank because the team was defeated.
Scenario #: in the top left corner of the Scenario card.
Starting Salves for next session: Add 3 to your current session’s Starting Salve value and record it in the Starting Salve box for next session.
Session Score: Write “–10” (negative 10).
Important: None of the green boxes on your Score sheet are filled in when your team is defeated.
3. Advance or Repeat the Scenario
After completing a scenario, any Boss cards, Environment tiles, and Minion cards used in the scenario should be shuffled back into their respective decks and placed back into the Card Caddy before setting up the next scenario.
If Your Team Won
Advance to the next scenario: Advance to the next scenario with any new Loot cards obtained.
If Your Team Lost
Repeat the scenario: Repeat this scenario (drawing a new Scenario card only if it’s a Portal Crawl) with 3 more Salves and any new Loot cards obtained.
Shop
After completing a Portal Crawl, it’s time to spend your hard-earned Gold at Rosella’s Shop.
1. Gold total per player
Round the amount on the Gold dial up to the nearest ![]() Gold, with all Heroes receiving this amount of Gold to spend in the shop.
Gold, with all Heroes receiving this amount of Gold to spend in the shop.
Tip: Use your own Health dial to track how much Gold you have to spend.
Example: If the Gold dial shows 27 Gold, increase this to 30, and all Heroes have 30 Gold to spend.
2. Deal Shop Cards
Deal each player a hand of Loot cards of the amount and type indicated in the Conclusion section of the Scenario card.
Important: Players may look at these Loot cards, but not at any Unidentified Loot cards they gathered during the Portal Crawl.
3. Gain Cards
Perform any of the actions below, any number of times and in any order.
Buy: Spend Gold to add one of the cards dealt to you during Step 2 (“Deal Shop cards”) to your deck. See the Shopkeeper leaflet’s Price Tag for its cost.
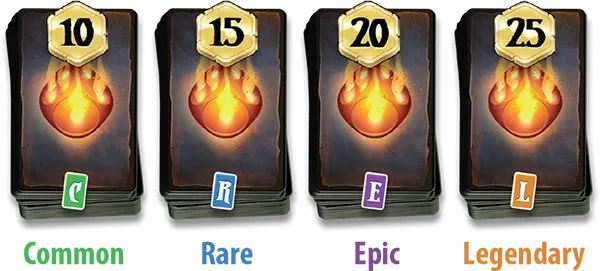
If you buy a Loot card of a higher level than one already in your deck (e.g. “So Wild II!”), pay only the difference in the two card’s costs. For example, if you want to buy an Epic card while you already have the Rare version of the same card, you only pay
 Gold.
Gold.You may not buy lower level versions of Loot cards already in your deck. Place them at the bottom of the appropriate Loot deck and draw a replacement card from the top. Repeat this as many times as necessary.
Identify: Spend ![]() Gold to Identify an Unidentified Loot card. The identified Loot card is instantly added to your deck.
Gold to Identify an Unidentified Loot card. The identified Loot card is instantly added to your deck.
- If you Identify a Loot card of a lower level than one already in your deck, place the lower level card on the bottom of its Loot deck and draw a replacement card from the top. Repeat this as many times as necessary.
Sell: Unidentified Loot cards (or any Loot card currently in your deck), may be sold for ![]() Gold each.
Gold each.
When a card is sold, place it at the bottom of its Loot deck.
You cannot sell cards dealt to you during Step 2 (“Deal Shop cards”). These cards do not belong to you.
You cannot sell non-Loot cards (cards that do not have a crystal border).
Clean Up
After finishing the Shop phase, all obtained cards are shuffled into your deck for use during the next scenario.
All Unidentified cards and Shop cards that were not bought or identified are returned to their respective Loot decks.
Note: Unidentified loot cards cannot be carried over to the next scenario.
Boss
Previously defeated in battle by the Mad King and now in his eternal servitude, they are found in the Boss Battle scenarios after each Portal Crawl.

Each boss has a board that has the same information as a hero board.
Boss Portal
The final Environment you need to explore to complete a Portal Crawl. May not be explored until all 3 Portal Shards have been collected.
Chaos Dice
Difficulty
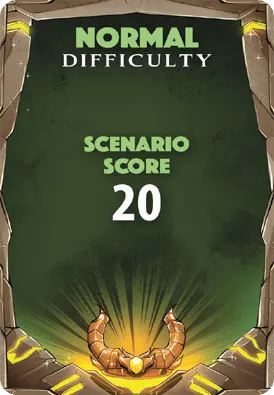
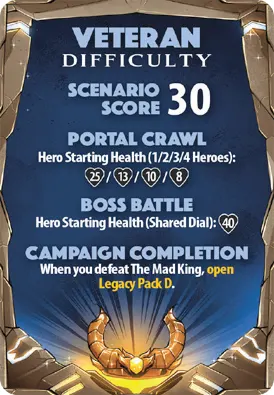
Dice Throne Adventures can be played at different difficulty levels. The difficulty card will tell you how many points each scenario win is worth, and will also tell you what adjustments to the base game need to be made (if any) to play at the higher difficulty.
Engaged
Whenever a hero is on an Environment tile with a Minion, they are engaged in battle. They remain engaged until the Minion is defeated, or the players lose the Portal Crawl.
A Hero can never be engaged with more than one Minion at a time.
Environment Tile
Your team moves across and explores these during a Portal Crawl.
Equipment Card
A special Loot card whose effects remain in play for the duration of the scenario.
Gold
Gold is gained during a Portal Crawl and spent at the Shop to buy new Loot cards.
Use the Gold Dial to track the amount of Gold gained by your team.
Loot Die
20-sided die that is rolled when you gain Loot. It can only be re-rolled or have its result changed by cards and abilities that specifically mention the Loot die .
Loot
The rewards gained from Boss Loot and Loot Chests:
“No Solo” symbol
Do not use if playing a solo game. Put on the bottom of its respective deck and draw another card.
Roll Objective
The dice results a Minion or Boss is aiming for to Activate an Offensive Ability.
Scenario Points
Used to calculate your Session Score and eventually your Campaign Score — which lets you compare your accomplishments with those of other teams.
In a Portal Crawl you gain Scenario Points for:
- Unspent Salve (1 point each)
- Unspent Gold (1 per 5 gold)
- Exploring all Environment tiles (5 points)
- Scenario Score (based on Difficulty)
In a Boss Battle you gain Scenario Points for:
- Unspent Salve (1 point each)
- Unclaimed Boss Loot cards
- Scenario Score (based on Difficulty)
Record the Scenario Points you gain during Scenario Conclusion.
Session Score
The total number of Scenario Points gained (or lost) from a Portal Crawl or Boss Battle. Used to calculate your Campaign Score, which lets you compare your accomplishments with those of other teams. Recorded during Scenario Conclusion.
Swap Icon
Indicates that a Loot card replaces a common Dice Throne card in a Hero’s deck.
Unique Defense
Activated against all damage types apart from Ultimate Abilities unless stated otherwise.
Unidentified Loot card
Any Common/Rare/Epic/Legendary Loot card gained from a Loot Chest and stored under your Hero board until the Shop Phase. Do not look at the card. You won’t discover what it is unless you pay ![]() Gold to identify it during the Shop Phase.
Gold to identify it during the Shop Phase.
Accuracy
Positive Status Effect | Stack limit: 1
Spend to make your Attack undefendable:
A player with this token may spend it at the conclusion of their Offensive Roll Phase to make their Attack undefendable.
Back Strike
Positive Status Effect | Stack limit: 1
Spend to deal ½ of 1 dmg:
When a player with Back Strike receives dmg as a result of an opponent’s Offensive Roll Phase, they may choose to spend this token. If spent, roll 1 . Then deal ½ the value as dmg (rounded up) to the attacking player.
Barbed Vine
Negative Status Effect | Stack limit: 1
Receive dmg for additional Roll Attempts:
A player afflicted with this token receives dmg for each Roll Attempt beyond the first during their Offensive Roll Phase, up to a maximum of dmg per turn. This token is removed and then this dmg is applied at the conclusion of the Roll Phase.
Bleed
Negative Status Effect | Stack limit: 2
Roll 1 in Upkeep Phase. On 1–4, receive dmg, otherwise, remove token:
A player afflicted with this token must roll 1 during their Upkeep Phase. On 1–4, they are dealt dmg. On 5–6, remove this token.
Blessing of Divinity
Unique Status Effect | Stack limit: 1
Prevent being defeated:
The next time a player (or team) with this token would have their health reduced to , remove this token and set their health to instead. This token may not be removed or transferred by any other means.
Blind
Negative Status Effect | Stack limit: 1
On 1–2, fail Offensive Roll Phase:
The next time a player afflicted with this token concludes their Offensive Roll Phase, they must remove it and roll 1 . On 1–2, their Offensive Roll Phase fails and has no effect of any kind.
Blinding Light
Negative Status Effect | Stack limit: 1
Roll 1 to fail or reduce Attack dmg:
The next time a player afflicted with this token concludes their Offensive Roll Phase, they must remove this token and roll 1 :
- On 1, their Offensive Roll Phase has no effect of any kind.
- On 2–3, any dmg they deal for the remainder of the Roll Phase is reduced by ½ (rounded up).
Blood Power
Positive Status Effect | Stack limit: 5
A player with these tokens may spend them to activate each effect once per turn:
1 token: If your Offensive Roll Phase results in an Attack, add dmg. This counts as an Attack Modifier.
2 tokens: Remove a status effect from a chosen player. This effect may only be activated during your Main Phase.
3 tokens: Draw .
4 tokens: Heal equal to the amount of damage your Attack successfully dealt. This effect may only be activated during your Roll Phase.
If your Attack successfully deals dmg to an opponent inflicted with 2 Bleed tokens, gain Blood Power at the conclusion of your turn.
Bonus Damage
Positive Status Effect | Stack limit: 2
Bonus Damage tokens add the indicated amount of damage to an Attack. Attack Modifier.
If you gain a Bonus Damage token while at Stack Limit, you must either replace a previous Bonus Damage token, or discard the new Bonus Damage token.
Bounty
Negative Status Effect | Stack limit: 1
Incoming Attack dmg & Attacker gets :
When a player afflicted with this token is Attacked by an opponent, the attacker increases their dmg by and gains .
Burn
Negative Status Effect | Stack limit: 1
Receive dmg in Upkeep Phase:
A player afflicted with this token receives dmg during their Upkeep Phase.
Chaos
Positive Status Effect | Stack limit: 6
These tokens are gained and spent by various Minions and Bosses to power certain abilities. The specific Minion/Boss ability indicates how these tokens are used. These tokens may not be used by Heroes.
Cheer
Positive Status Effect | Stack limit: 3
Spend to re-roll or change one of your dice to a 6:
A player with this token may:
- Spend 1 to re-roll 1 of their dice.
- Spend 3 to change any one of their dice to a 6.
Chi
Positive Status Effect | Stack limit: 5
A player may spend these tokens to increase or reduce dmg:
Chi tokens may be spent at any time to prevent incoming damage per token.
Alternatively, you may spend Chi to increase Attack dmg by per token spent. Chi may not be used to increase dmg the turn that it was gained.
Cleanse
Positive Status Effect | Stack limit: 3
Spend to remove one status effect token:
A player with this token may spend it at any time to remove a single status effect token from themselves.
Coal
Negative Status Effect | Stack limit: 4
Prevents from being gained:
The next time a player with four of these tokens would gain , they must first remove all Coal tokens. Then reduce the amount of gained by .
Concussion
Negative Status Effect | Stack limit: 1
Skip Income Phase:
A player afflicted with this token must skip their Income Phase and then remove this token.
Constrict
Negative Status Effect | Stack limit: 1
Spend per additional Roll Attempt:
During their next Offensive Roll Phase, a player afflicted with this token must pay per Roll Attempt beyond the first. At the conclusion of the Roll Phase, remove this token.
Crit
Positive Status Effect | Stack limit: 1
Spend to add dmg to your Attack:
If a player with this token is dealing at least dmg as a result of their Offensive Roll Phase, this token may be spent to deal dmg.
Cursed Doubloon
Unique Status Effect | Stack limit: 5/3
Receive dmg in Upkeep Phase (except Pirate):
- Any player other than the Pirate afflicted with Cursed Doubloons is dealt dmg per Cursed Doubloon during their Upkeep Phase.
- These Persistent tokens may not be moved or removed from any player except as a result of abilities on the Pirate’s hero board.
- Whenever the Pirate would gain a Cursed Doubloon , she may choose not to.
- Cursed Doubloon tokens may stack up to 5x on the Pirate and up to 3x on anyone else.
Delayed Poison
Negative Status Effect | Stack limit: 2
Receive dmg at the end of your turn:
A player afflicted with this token removes it at the conclusion of their turn and then receives dmg.
Dominance
Unique Status Effect | Stack limit: 1
When a player with this token Attacks, they must roll 1 :
- On 1, they must choose a teammate to target instead. If they cannot, they must discard randomly. Then remove this token.
- On 2-5, do nothing.
- On 6, remove this token.
This token may not be transferred by any means (but can be removed).
Dryad Spirit
Companion | Stack limit: 1
Spend Dryad to add dmg. Attack Modifier.
If an opponent’s Attack would inflict a Negative Status Effect upon you, you may spend Dryad at the conclusion of their Offensive Roll Phase to prevent that incoming status effect.
Egg Nog
Positive Status Effect | Stack limit: 5
Spend 3 for a benefit:
A player may spend 3 of these tokens at any time to roll 1 :
On
 , deal to a chosen opponent as an isolated source of undefendable dmg.
On
 , Heal and gain .
On
 , Heal and draw card.
Entangle
Negative Status Effect | Stack limit: 1
Lose 1 Roll Attempt:
A player afflicted with this token gets 1 fewer Roll Attempts during their next Offensive Roll Phase. At the conclusion of the Roll Phase, remove this token.
Evasive
Positive Status Effect | Stack limit: 3
Spend & roll 1–2 to dodge incoming damage:
When a player with this token receives damage, they may choose to spend it. If spent, roll 1 . If the outcome is 1–2, no damage is received (although other associated effects may still apply). Multiple tokens may be spent in an attempt to prevent the same source of damage.
Fire Mastery
Positive Status Effect | Stack limit: 5
Remove 1 token per turn:
A player with this token must “cool off” during their Upkeep Phase by removing 1 token (Fire Mastery increases the power of various abilities).
Flight
Positive Status Effect | Stack limit: 3
Roll 2 to dodge or make undefendable:
A player with this token may spend it at any time during the Roll Phase. Once spent, roll 2 . If a 6 was rolled, Activate this token. If Activated during the Offensive Roll Phase, this player’s Attack becomes undefendable. If Activated during the Defensive Roll Phase, ignore all incoming damage.
Gift
Unique Status Effect | Stack limit: 3
Spend to gain a Reject:
During your Main Phase, you may spend this token to draw a card from the Reject deck and put it into play. This token may not be transferred by any means (but can be removed).
Heal Bot
Companion | Activation limit: 2
You may Activate this Bot up to two times after being Attacked with at least dmg. Upon activation, roll 1 :
Hex
Unique Status Effect | Stack limit: 1
Whenever a player afflicted with this token rolls a 6, it’s as if their die has been altered to a blank die face that has no value. At the conclusion of their turn, remove this token. This token may not be transferred by any means (but can be removed).
Holy Presence
Unique Status Effect | Stack limit: 2
Deal dmg to all opponents:
During their Upkeep Phase, a player with this token deals dmg to all opponents. This token may not be transferred by any means (but can be removed).
Honor
Positive Status Effect | Stack limit: 2
Spend to increase Attack dmg:
Spend to increase your Attack dmg by or spend 2 Honor to increase your Attack dmg by .
Knockdown
Negative Status Effect | Stack limit: 1
Spend or skip Offensive Roll Phase:
To remove this token, a player afflicted with it must spend before the start of their Offensive Roll Phase. If the player does not, they must skip their Offensive Roll Phase and then remove this token.
Life Siphon
Unique Status Effect | Stack limit: 2
If your Offensive Roll Phase results in an Attack, Steal 1 Health. This token may not be transferred by any means (but can be removed).
Mesmerize
Positive Status Effect | Stack limit: 1
Force an opponent to re-roll a die:
A player with this token may spend it and roll 1 . On 5–6, you may force the opponent to re-roll any 1 die.
Nanite
Negative Status Effect | Stack limit: 3
Deals dmg based on number of Nanites:
When Detonated, remove all tokens and deal dmg based on the number of Nanites on each player:
- 1 Nanite: dmg.
- 2 Nanites: dmg.
- 3 Nanites: dmg.
During Upkeep Phase, a player rolls 1 per Nanite they are afflicted with: on 6, remove this token.
Nanobot
Companion | Activation limit: 1
You may Activate this Bot during your Upkeep Phase. Upon activation, Detonate all Nanites .
Ninjutsu
Positive Status Effect | Stack limit: 3
Spend & roll to modify your Attack:
After Attacking, a player with this token may spend it and roll 1 :
- On 1–3, add dmg.
- On 4–5, add dmg.
- On 6, choose either to add dmg, Inflict Delayed Poison , or make your Attack undefendable.
Nyra
If you are being Attacked while Nyra is Active, you may choose to pass the full amount of this damage to Nyra instead (unless the opponent is Attacking with their Ultimate Ability).
If Nyra receives damage, you may still use your Defensive Ability.
If Nyra is Active and your Offensive Roll Phase results in an Attack, increase that dmg by .
If Nyra is Active during your Offensive Roll Phase, you may deal dmg to her and then re-roll 1 . This may only be done once per turn.
Nyra’s Bond
Positive Status Effect | Stack limit: 1
Distribute damage received between Huntress & Nyra:
Parasite
Negative Status Effect | Stack limit: 1
During their Upkeep Phase, if a player inflicted with this token has a Positive Status Effect, they receive dmg. Additionally, if they spend a Positive Status Effect to successfully prevent or avoid dmg, remove Parasite and they receive as an isolated source of undefendable dmg.
Parlay
Negative Status Effect | Stack limit: 1
Deal no dmg when Attacking:
A player afflicted with Parlay may not deal any damage as a result of their Offensive Roll Phase (although other effects may still apply). At the conclusion of the Roll Phase, remove this token.
Poison
Negative Status Effect | Stack limit: 3
Receive dmg in Upkeep Phase:
A player afflicted with this token is dealt dmg per Poison token during the Upkeep Phase of their turn.
Portal Shards
You must collect all 3 on every Portal Crawl. When collected, they are placed on the Boss Portal, which then allows you to face its powerful Minion.
Powder Keg
Negative Status Effect | Stack limit: 1
Roll 1 in Upkeep Phase. On 1–2, receive dmg, on 6 pass it to anyone:
A player afflicted with this token must roll 1 during their Upkeep Phase. On 1–2, the Keg blows up. On 3–5, nothing happens. On 6, the player afflicted with Powder Keg may transfer the token to a chosen player. Additionally, if a player becomes inflicted with Powder Keg while already inflicted with Powder Keg , the first Keg immediately blows up. When a Keg blows up, remove it and deal as an isolated source of undefendable dmg.
Protect
Positive Status Effect | Stack limit: 1
Prevent incoming damage:
A player with this token may spend it at any time to prevent incoming damage (rounded up).
Rejects
Note: Rejects are a deck of cards.
Each Reject may be Activated once per turn to provide an immediate effect.
Whenever a Reject is drawn, it is immediately put into play (face up next to your hero board).
When Activating a Reject, resolve the Activation Effect and then discard it (into the Reject discard pile).
You may only have 3 Rejects in play at a time and they have no effect until Activated.
If you ever have more than 3 Rejects, you must immediately discard back down to 3 (without Activating any of the discarded Rejects).
If you ever need to draw a Reject and none are available, shuffle the Reject discard pile to form a new Reject deck.
Reload
Positive Status Effect | Stack limit: 2
Spend to add ½ of 1 to your Attack dmg:
After Attacking, a player with this token may spend it and roll 1 to add ½ the value as dmg (rounded up).
Retribution
Positive Status Effect | Stack limit: 1
Spend when Attacked to deal ½ dmg back:
This token may be spent after being Attacked as a result of an opponent’s Offensive Roll Phase to deal half of the incoming dmg (rounded up) back to the Attacker.
Sapling Spirit
Companion | Stack limit: 2
Seedling Spirit
Companion | Stack limit: 3
- Spend Seedling to re-roll 1 of your dice.
Shadows
Positive Status Effect | Stack limit: 1
A player with this token avoids damage:
When a player with this token is damaged as a result of an opponent’s Offensive Roll Phase, no damage is received and no defense is made (although the attack still “succeeds” & other effects may apply). Discard this token after the affected player starts & concludes a single turn while under its effects.
Shame
Negative Status Effect | Stack limit: 2
Reduces Attack dmg by :
When a player with a Shame token would deal normal or undefendable damage as a result of an Attack, remove this token and reduce that dmg by per Shame token removed.
Shock Bot
Companion | Activation limit: 1
If your Offensive Roll Phase results in an Attack, you may Activate this Bot. Upon activation, increase that dmg by . This Bot may never be activated twice in one turn.
Silence
Unique Status Effect | Stack limit: 1
A player afflicted with this token may not Activate their Small Straight or Large Straight abilities. At the conclusion of their turn, remove this token.
Smoke Bomb
Positive Status Effect | Stack limit: 1
Spend & roll 1–3 to avoid damage:
When a player with this token receives dmg, they may choose to spend it. If spent, roll 1 . If the outcome is 1–3, no dmg is received (although other associated effects may still apply).
Sneak Attack
Positive Status Effect | Stack limit: 1
Spend to add 1 to your Attack dmg:
After Attacking, a player with this token may spend it and roll 1 to add the value of the die to their damage total.
Stun
Negative Status Effect | Stack limit: 1
Perform another Offensive Roll Phase:
A player afflicted with this token may take no actions of any kind (i.e. no cards may be played, no defense may be made, no status tokens or passive abilities may be used, etc). After the Attack concludes, the player who inflicted Stun removes the token and then immediately targets the same opponent with an additional Offensive Roll Phase (if this opponent is removed from the battlefield, this additional Offensive Roll Phase is forfeited).
Synth
Positive Status Effect | Stack limit: 7
Spend during Main Phase to build a Bot:
- 2 tokens: Build a Basic Bot, placing it on the Artificer.
- 3 tokens: Upgrade a Basic Bot to Advanced (flip token).
Spend to Activate Bots:
- 2 tokens: Activate a Basic Bot.
- 1 token: Activate an Advanced Bot.
Tactical Advantage
Positive Status Effect | Stack limit: 5
A player with these tokens may spend them at any time to activate a variety of effects:
- 1 token: Gain .
- 1 token: You may re-roll 1 of your dice at any time.
- 3 tokens: Draw .
- 3 tokens: Inflict Targeted on a chosen opponent.
- 4 tokens: A chosen player gains Protect .
- 4 tokens: Transfer one status effect from any player to any player. This may only be done during your Main Phase.
Targeted
Negative Status Effect | Stack limit: 1
+2 incoming Attack damage:
When a player afflicted with this token is Attacked by an opponent, the Incoming Attack dmg is increased by .
Wellspring
Positive Status Effect | Stack limit: 1
Heal ½ of 1 during Main Phase:
A player with this token may spend it during their Main Phase & roll 1 : gain ½ the value as Health (rounded up).
Wither
Negative Status Effect | Stack limit: 2
Reduce Attack dmg by per token:
When a player with a Wither token would deal normal or undefendable damage as a result of an Attack, reduce that dmg by per Wither token.